Do you need to learn how to make letterhead in Word but feel overwhelmed by all the options? Business professionals create custom letterheads to project credibility, but many struggle with placing logos and contact information correctly. I’ll walk you through the essential Microsoft Word tools, including headers, footers, and template features. This practical tutorial shows you exactly how to position each element and save your design as a reusable template. (Includes video tutorial.)
Knowledge You’ll Gain:
By the end of this tutorial, you will be able to:
- Create custom letterhead designs using Word’s header and footer tools
- Insert and format logos and graphics professionally
- Set up proper spacing and margins for business documents
- Save and reuse templates for consistent branding
- Implement legal requirements in your letterhead design
I’ll be using Microsoft Word for this step-by-step tutorial, which is included in Microsoft 365 (Formerly Office 365). I’ve also done a Google Docs letterhead as well. As a bonus, you can use a letterhead when doing a mail merge.
Understand Benefits and Legal Requirements
A well-designed letterhead enhances your brand image and communication efficiency. Mainly, it ensures consistency across your documents and reflects professionalism. These benefits include:
- Enhances your brand credibility and identity
- Streamlines communication
- Saves time
- Reduces miscommunication
- Reflects professionalism and attention to detail
While a well-designed letterhead offers numerous benefits, it’s essential to consider the legal aspects too. Business letterheads may have legal implications. Requirements vary by location and industry, so it’s crucial to research the specific rules for your location and profession.
Most regulations focus on including key information on your letterhead, such as your business name and address. Some jurisdictions may require your company registration number and tax numbers (e.g., VAT or GST).
Now that we’ve covered the legal aspects, let’s explore designing your letterhead.
TextExpander: Worth It? Find Out.
Is TextExpander the right tool to boost your productivity? Get an independent assessment, weigh the pros and cons, and make an informed decision. Find out why I’m a fan.
Read the ReviewPlan Your Letterhead Design Elements
The key to letterhead design is deciding what you want to display. Although creating the template is simple, you should do some planning. It helps to take a blank sheet of paper and sketch your design. Nothing fancy, as this is a mockup. This will help you choose the starting page header. The good news is once you grasp the power of templates, you can make changes or use different versions.
When creating your templates, you might consider using Quick Parts to add reusable assets to the Building Block Organizer. Then, you can easily find and insert those parts into other document areas.
The list of elements can vary based on whether you’re an individual, organization, or company. For example, if you’re doing a company letterhead, you might not have a slogan, or if you’re a law firm, you may not have social media addresses. To get you started, here are some visual elements I’ve seen when viewing letterhead examples:
- Brand Logo
- Slogan or tagline
- Name
- Mailing Address
- Phone numbers (office and mobile)
- Web address
- Email address
- Professional license numbers
- Memberships and awards
- Established date
- Social media addresses
- color scheme
Obviously, the items you choose also relate to whether you’re doing a business letterhead template versus a personal letterhead template. Once you’ve identified the items to include, you should determine their placement. For example, I split my elements between Microsoft’s Word header and footer.
Template Graphics Considerations
Images or logos can improve the design and be impactful. But pictures can pose design problems. For example, you may find a great graphic, but your office printer doesn’t do it justice. This is because your printer’s capabilities aren’t good enough to display the image. And we all know how pictures differ when you’re running low on printer ink.
The flip side is when you have a great printer, but the image file isn’t as good as it should be. This could result from reducing the image file size too much, so it appears pixelated.
Another issue is that the image you use has too much white space, so you need to crop or adjust the image. But, again, an image capture program like SnagIt can do crops and adjustments.
If you work for a company or organization, you should check if they have an identity or “style guide.” They often have approved graphics they can give you in the appropriate image size and file format. Just like templates, style guides can range from simple to complex. For example, HubSpot has an article that includes examples.
Adding a Logo or Image
In this tutorial, I’ll create a simple letterhead with logo starting from a blank document. It shares some of the steps we used for our Cornell Notes template. The page header will have my site logo, and the page footer will have my postal address. And yes, Microsoft Word could handle my logo, which is an SVG file.
- Start with a blank Word document.
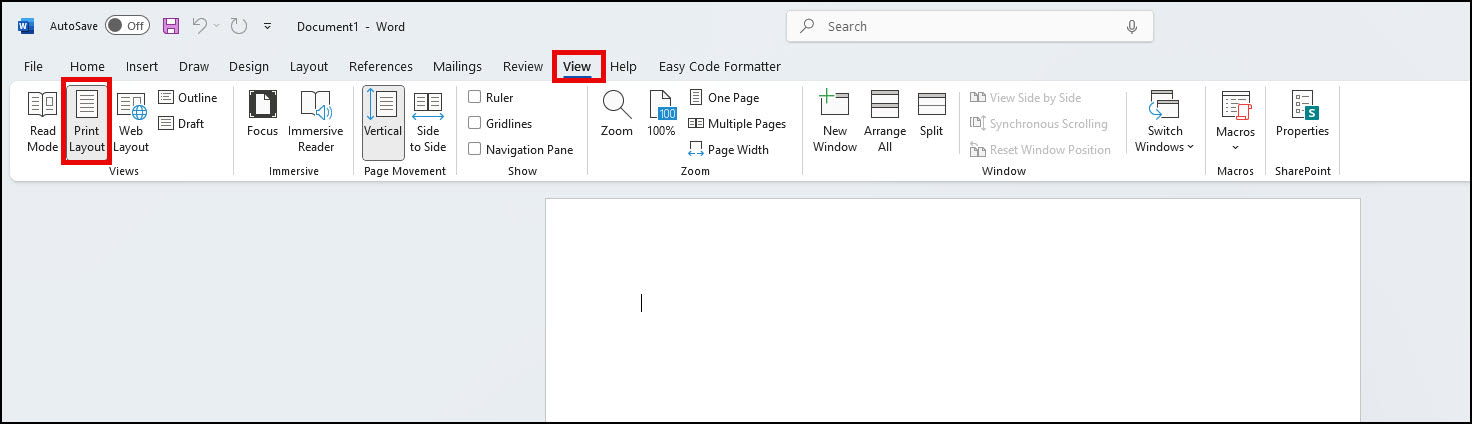
- Click the View tab and select Print Layout.
- From the Insert tab, select Header. It’s in the Header & Footer group. Microsoft Word will display a list with numerous built-in Header styles.
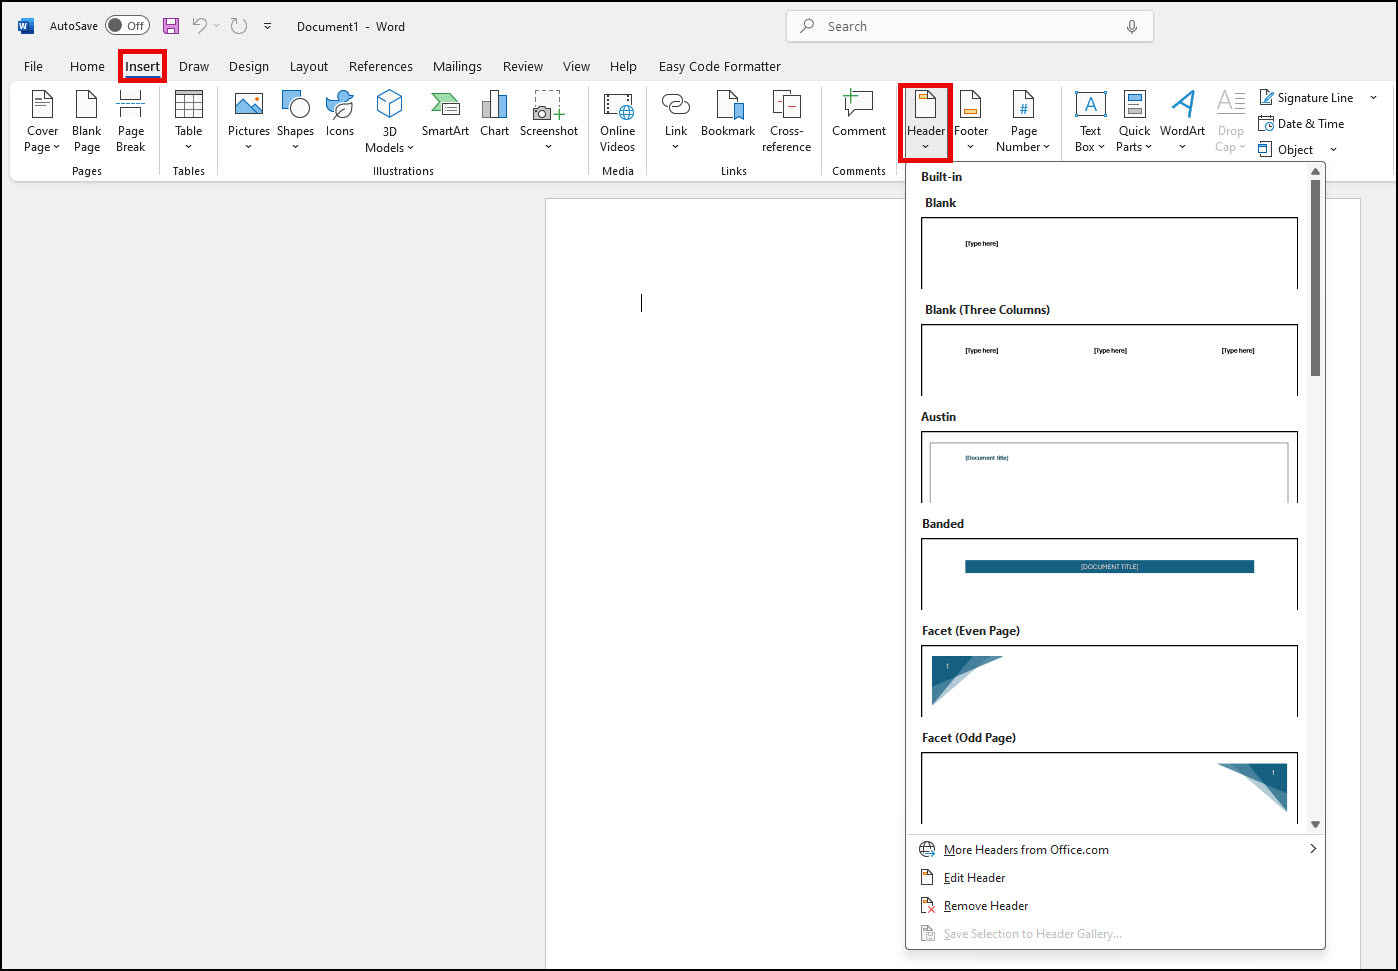
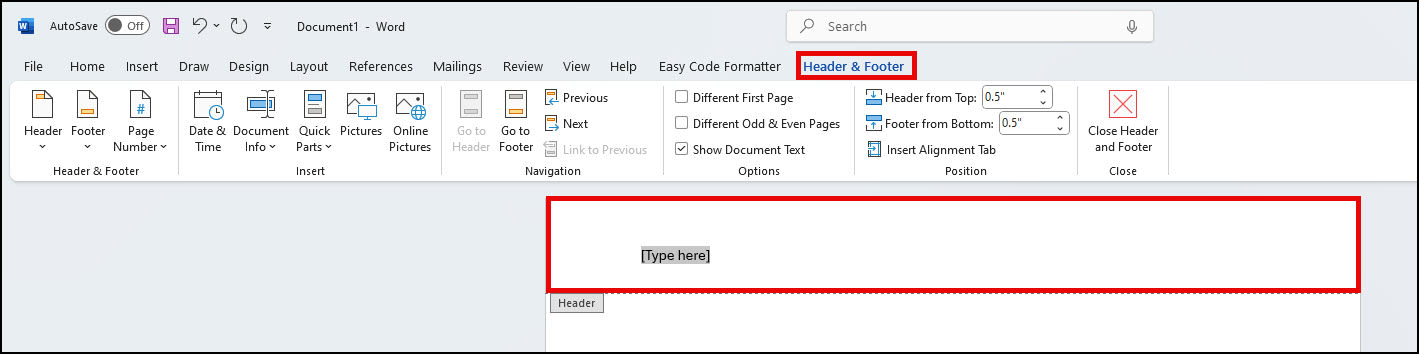
- Click the style you prefer. I like the top Blank style. You’re now in “Design” mode. You should see a Header marker tab on the bottom left and placeholder text above.
- Click the Insert tab. In the Illustrations group, click Pictures.
- The Insert File dialog box will open. Find your image file and click Insert. If your image is too large, Word will scale to fit the width.
- Review your image to see if it’s balanced. In my example, I think my logo is twice my desired size.
- In the Size group, click the dialog box launcher in the bottom right-corner. It looks like a tiny icon box with a diagonal arrow
 .
. - The Layout dialog box appears with various scaling options. My initial logo was 20%, and I reduced it to 10%.
- Click OK to accept the new image size. The image will left-align.
- Click the image.
- Press Ctrl + E. This should center-align the image.
- Optional: Add any other text you might like in this area.
Designing a Letterhead Footer
I include my address with a smaller font and a vertical line or pipe sign in the footer area. I also centered the text.
- From the Insert menu, select Footer. As before, Word will display a series of built-in Footer styles.
- Click the style you prefer. A placeholder footer appears.

- Add in your text, such as your address.
- If you wish to change the font, highlight your text. This will open the mini format bar.

- Optional: If you wish to center your text, click Ctrl + E.
- Double-click the small Footer marker at the top left to get out of design mode.
This is also a good time to print your custom letterhead to check any artwork’s color and clarity. Your online version may show colors that are muted but print fine. You may also need to adjust your printer settings if they are in draft or economical print mode.
If you need to edit the header or footer to get into design mode, double-click anywhere in the header or footer area. The small tab markers will show to the far left.
Saving Your Letterhead Template – (*.dotx)
Aside from tweaking your header and footer, you may want to adjust other properties before saving the file. For example, you might change the margins, fonts, or style.
- From the File menu, select Save As…
- In the Save As dialog, change the Save as type: to Word Template (*.dotx).
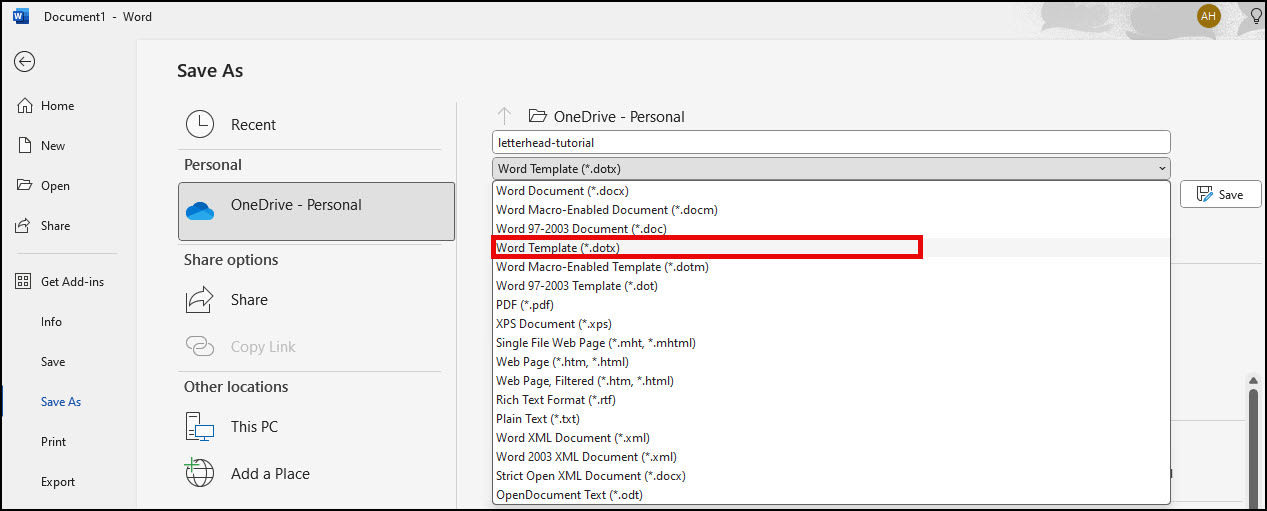
- Provide a descriptive name for your template, such as “letterhead”.
- Click Save.
Using Your Letterhead Template
When you saved the template, Microsoft Word stored it in a templates folder. However, you can create a custom location if you prefer.
To use the letterhead template,
- Open Microsoft Word and select New from the File menu or Backstage view.
- Click Personal.

- Double-click the template you wish to use. A new document will open based on your selection.
If you don’t see your custom templates and a Personal link, you might have a missing Word Options setting. See how to fix missing Personal tab in Word.
Finding Your Templates Folder
Microsoft stores your templates in a designated folder. You can find the location using these steps.
- Click the File menu from the ribbon.
- From the left navigation pane, click Options.
- From the Word Options dialog box, click Advanced.
- Scroll to the General section. It’s towards the bottom.
- Click the File Locations… button.
- In the File Locations dialog box, double-click User templates.
- Windows File Explorer will open the folder.
- Click the Cancel button.
If you need to find the full file path, you can shift + right-click on the file name.
After creating your professional letterhead template, you can produce consistent, branded documents with just a few clicks. Looking to make your documents even more polished? I’ve selected several related tutorials below that will help you add professional touches like watermarks, special characters, and text wrapping. Each guide offers practical steps to enhance your Microsoft Word skills.
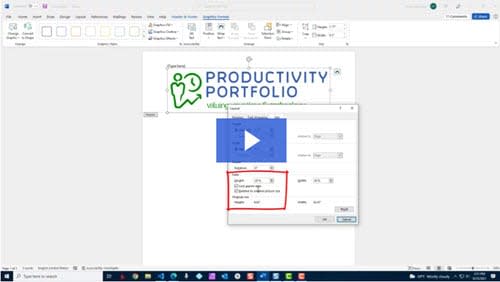
Letterhead Video Tutorial
This 4-minute video was recorded using an earlier version Microsoft Office 365 so some screens may differ. Click the image below to see the video page.