Have you ever started a document and thought about previous documents and content types? Chances are we have plenty of reusable content from past projects that we can leverage. In this tutorial, I’ll show you how to use Word Quick Parts to speed up document creation and workflow.
What Are Quick Parts
Quick Parts is a long-standing feature available in Microsoft Word and Microsoft Outlook. I first wrote about using Quick Parts in Outlook in 2008. The feature allows you to insert predefined reusable assets, document properties, or fields. These assets could be by Microsoft or the ones you create.
For this tutorial, we’ll deal with AutoText, Quick Parts Galley, and the Building Blocks Organizer. With the exception of document properties and fields, everything flows into the Building Blocks Organizer. Some other examples include:
- text
- images
- watermarks
- equations
- headers and footers
- tables
- signature blocks
On the surface, this may not sound exciting or even productive. However, Microsoft allows you to roll your own. This gives you flexibility and speed. For example, instead of editing an old document, you can start with a new one and insert your content types.
Let’s say you’re a web designer responding to a request for proposal (RFP) or drawing up a contract. Chances are, you’ve seen countless requirements and contracts. Using your previous work, you could use Quick Parts for your most frequent content items. Even though each proposal is different, you could create text blocks that define the following:
- Scope of work
- Project timeline
- Payment terms
- Client responsibilities
- Warranty
You might think of this list as boilerplate content.
Understanding Building Blocks
While the Word ribbon uses the phrase Quick Parts, these are a subset of building blocks. Any Quick Part asset you create can be found in the Building Blocks Organizer. Each block can be defined by its:
- Name [A]
- Gallery [B]
- Category [C]
- Template [D]
- Description [E]
The block organizer shows a list of assets that you can sort by various column headers. The block Description and Preview appear when you highlight an asset.

Creating a Quick Part
Before creating your asset, you may want to think about how granular you want to be. Microsoft doesn’t care about size or the amount of text, but you may. Returning to our web designer, some may want to break down their typical contract into the items I mentioned earlier. Others might combine several sections.
In this tutorial, I’ve copied text from a sample contract. In addition, I added variable placeholders for items such as dates [Date] and prices [Payment amount]. These placeholders [ ] remind me I need to edit the block after I insert the Quick Part.
To create an AutoText Quick Part
In this example, I’ll create an AutoText entry. This particular type of Quick Parts has its own menu item. These are text items you use frequently.
The AutoText menu entries are sorted by Category and then Name. You can start the name with an underscore if you wish to have your item at the top of a category. You can also create categories.
- Highlight the text you would like to use.

- From the ribbon’s Insert tab, click the Quick Parts button. It is in the Text group.
- From the drop-down menu, select AutoText.
- From the slide-out menu, select Save Selection to AutoText Gallery.
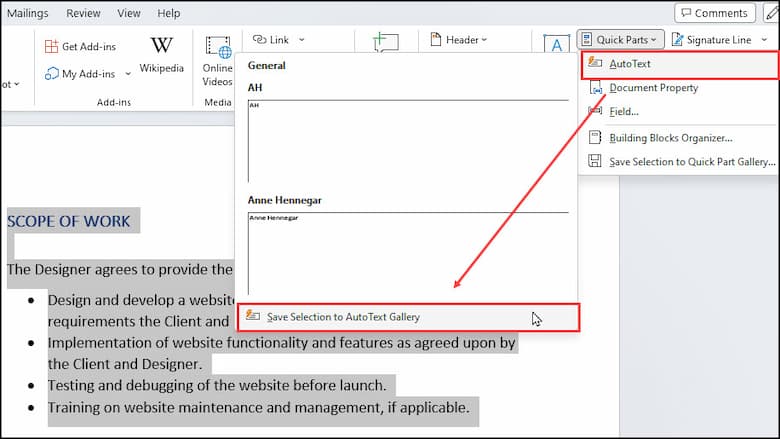
- The Create New Building Block dialog opens.

- Make any changes to the block parameters. You can amend it later if needed.
- Click the OK button.
Adding Parts to a Document
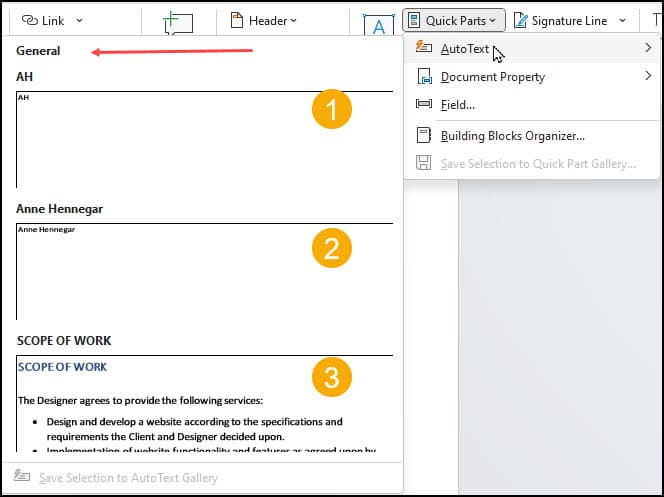
Any asset in the Building Blocks Organizer can be placed in your Word document. The advantage of AutoText entries is they are readily available from the side menu. For example, three AutoText items are in the screen snap below. The first two were created automatically by Microsoft when I installed Word. The third item is the custom one I added.
Inserting AutoText Entries
- Place your cursor where you’d like to add your AutoText entry.
- Click the Quick Parts button in the Text group.
- Hover over the AutoText menu.
- Select your entry from the slide-out menu.
Adding From Building Blocks Organizer
The Organizer also allows you to add items to your document. Unfortunately, the tool doesn’t have a search mechanism. You’ll need to scroll through the list or sort by a column. By default, the Organizer sorts by Gallery names with AutoText at the top. You can click the Name, Category, or Template columns, and the list will resort.
The organizer also has several columns that don’t display unless you use the scroll bar. These include:
- Description
- Behavior
You can drag a column header to a new position. However, when you close the dialog box, the temporary position will revert to the standard order.
You may recall from a previous tutorial I made a custom watermark in Word which I saved to my watermark gallery. In turn, those assets also feed into the Building Block Organizer. Therefore, I don’t need to re-add them.
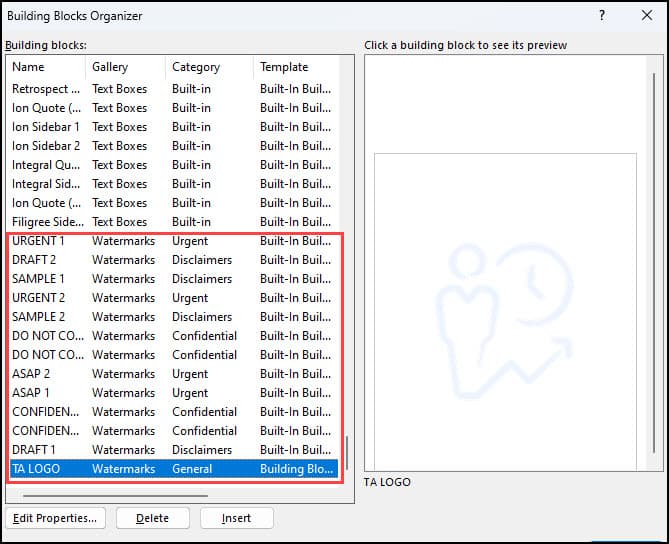
To add this watermark to a document, I’d highlight it and then click the Insert button. Regarding watermarks, I didn’t have to worry about positioning my cursor. Watermarks apply to the whole page.
Editing Block Properties
Sometimes when you save an asset, it’s not labeled correctly. For example, I want to create a new category instead of having my TA LOGO watermark in the General category.
- Click the Quick Parts button on the ribbon.
- Click Building Blocks Organizer…
- Highlight the block you wish to change.
- Click the Edit Properties… button in the lower left.
- The Modify Building Block dialog box opens.
- Click the down arrow next to Category.
- From the drop-down list, click Create new category…
- In the Create New Category textbox, type the new value, such as “website“.
- Click OK.
- Click OK.
- Click Yes when asked if you want to redefine the building block.
The same procedure works if you change galleries, although this list is fixed. You can’t create new galleries. This is because there is logic behind galleries and how Word displays them. For example, changing my TA logo from Watermark to AutoText would add the entry to the AutoText side menu. However, if I inserted it with AutoText, it would behave as an image, not a watermark. The display logic changed.
Editing Block Content
You might think that Word has a block editor. Sorry, it doesn’t. In essence, you need to open the existing block, make changes and save it with the same name and properties.
- Open the Building Block Organizer and find the asset to change.
- Make note of the Name:, Gallery:, Category: and Save in: fields.
- Insert your building block into your document.
- Make any necessary changes.
- Highlight the asset as before.
- Click the Quick Parts button.
- Select Save Selection to Quick Part Gallery…
- On the Create New Building Block dialog box, remap the values to those in Step 2.
- Click OK.
After you save the block, you can go back and edit properties.
If you edit the properties and content simultaneously, you might create a duplicate building block.
Building Blocks and Templates
The initial template which stores all the built-in blocks is called Building Blocks.dotx. The location varies based on your operating system, username, Microsoft Word version, and language.
Below is an example from my Windows 11 desktop with my username of prodp. It’s a rather long path. You may have to turn on the feature to see hidden items in File Explorer.
C:\Users\[user name]\AppData\Roaming\Microsoft\Document Building Blocks\1033\16

Why Multiple Templates?
If you look at the screen snap above, you might wonder if I made a mistake because there are two similar template names. No, it’s by design.
- Building Blocks.dotx contains user-created items except for AutoText.
- Built-In Building Blocks.dotx contains the base blocks in Microsoft Word.
- normal.dotm contains your AutoText entries. It’s the default template for a new Word document.
In addition to the templates above, you can store items you create in other templates. For example, if you made a new document using a template called webprop.dotx, you could assign building blocks to it. These blocks would only show when your document was based on that template. This system makes it easier to share blocks by sharing the attached template.
Troubleshooting
While the process of building blocks is pretty easy, there are some things that can create issues. All are easy to resolve.
Why can’t I see the Quick Parts button on my ribbon?
You probably have resized Word, so portions of the ribbon collapsed. Word will shrink the group buttons and drop the labels. The fix is to widen Word until the button label reappears. The button is still there but much smaller.

I created a building block, but I can’t find it.
If you’re sure you created the asset, it might be assigned to a custom template that your current document isn’t using. For example, you made a watermark and assigned it to webprop.dotx. However, the document you’re editing is based on another template, such as normal.dotm.
My building block isn’t behaving correctly. Why?
One reason for this is you changed the Gallery type. For example, when I changed my TA LOGO from the Watermark gallery to AutoText, it no longer behaved as a watermark. It reverted to an image. Change your block back to the original gallery type and see if that fixes the problem.