Want to add a bit more personality or professionalism to your Microsoft Word documents? The answer could be as simple as using a watermark. Watermarks can be a powerful tool, from indicating a document’s status to displaying a logo. In this tutorial, I’ll show you the steps to create and customize your own watermark.
Why Use a Watermark
Like many people, if I send a confidential business document that is confidential or a draft, I include a watermark. These marks add context to the item and convey its status or importance. Moreover, they can also add an implied layer of protection. For example, few people would misinterpret your “draft” as your final document or forward a “confidential” document.
There is another group of users that create custom items using an image. These image watermarks differ from using a logo on a letterhead template because the image spans a more significant portion of the page than the header area.
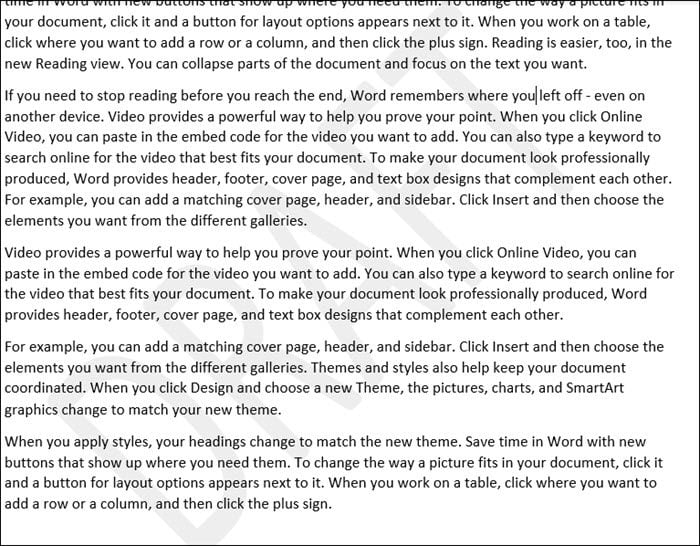
These semitransparent items appear on the page like a background image, and your text sits on top. The document text is readable, but you can see the watermark picture.
Default Text Watermarks
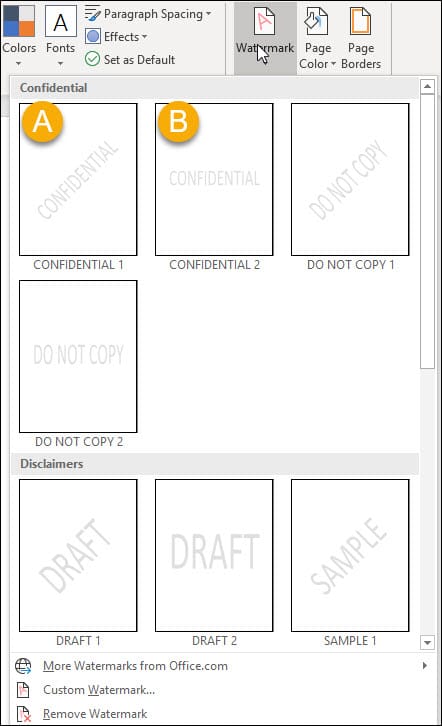
By default, Microsoft Word has six predefined watermarks. These simple text variations include:
- Confidential
- Do Not Copy
- Draft
- Sample
- ASAP
- Urgent
The above items are the easiest items to insert into your document. And you don’t have to worry about wrapping text around an image. Instead, the watermark sits on a different layer.
However, a secondary list of text watermarks is found in the drop-down Text box menu where you create a custom version. In addition to the list above, you also have:
- Copy
- Original
- Personal
- Top Secret
TextExpander: Worth It? Find Out.
Is TextExpander the right tool to boost your productivity? Get an independent assessment, weigh the pros and cons, and make an informed decision. Find out why I’m a fan.
Read the ReviewHow to Add a Watermark in Word
The time needed: 5 minutes.
You can either create the watermark first or add it later. I prefer writing my document first because I find the watermark distracting. I use Microsoft 365 for Windows for this tutorial, but the process is similar to earlier versions.
- Write your document.
- From the main menu, click View and select Print Layout.
- From the main menu, click the Design tab.
- To the far right is the Page Background group.

- Click the Watermark drop-down arrow.
- A drop-down panel appears with default examples. Each example includes a slanted page layout and a horizontal page layout.
- Click the watermark version you prefer. Your selection will show underneath your text in light gray.
Why Can’t I See My Watermark
You’re probably not in Print Layout mode if you can’t see your watermark. Your selected watermark is there but won’t show until you change your page layout.
- From the main menu, click View.
- From the Views group, click Print Layout.
You should now see your watermark.
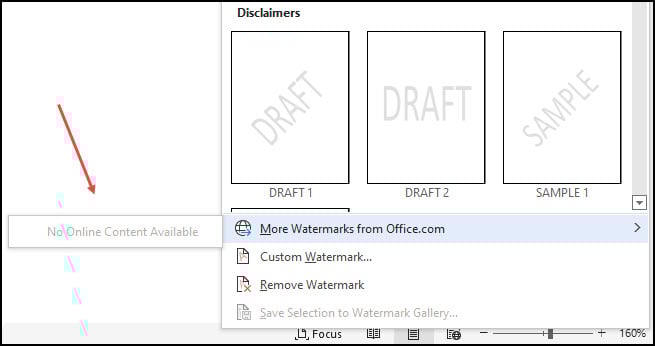
Skip Office.com Watermarks
Looking at the menu above, you’ll see a menu option labeled “More watermarks from Office.com. This leads you to believe that more are available. However, as you mouse over the option, it shows “No Online Content Available“. I don’t know why the item remains as it’s been this way for a long time.
The good news is that it is easy to create custom watermarks that can work with your Microsoft Word document.
Adding Custom Text Watermark
The default items fit most uses. However, there are times when you need something different. Perhaps, a wording change or orientation. In either case, Microsoft Word can accommodate your design needs.
- Follow Steps 1-5 in the previous section.
- Scan past the default thumbnails and choose Custom Watermark.
- The Printed Watermark dialog box opens.
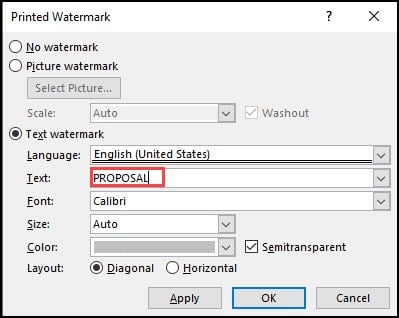
- Clear the value from the text box and enter your desired text. Or, you can click the control to the right and select a predefined option from the drop-down menu.
- Adjust the Font, Size, Color, and Layout options to suit your style.
- Click Apply.
- Click Close.
Your customized version should show on every page. In my case, it overwrote my previous item with my custom Watermark. Microsoft only allows one watermark per page.
You might want to create a custom Word keyboard shortcut if you use this feature often. For example, you could assign Alt + W to open the Printed Watermark dialog box shown above. Or, you could use a custom building block assigned to DRAFT.
Another way that you can access your mark is by using the Building Block Organizer. You will see your entry grouped in the Watermark Gallery.
Adding an Image
Perhaps, words aren’t enough. Sometimes you want to spruce things up with an image. This could be a simple picture or a logo representing your brand. You can upload images from your computer, Bing Image Search, or Microsoft OneDrive.
The idea is not to select a picture that competes with your document or consumes your printer ink. Microsoft Word allows most image file formats except for SVG.
- Find a suitable image. The simplest is preferred.
- Follow steps 1-3 from above.
- On the Printed Watermark dialog box, click the radio button for the Picture watermark.
- Click the Select Picture button.
- The Insert Picture panel opens.
- Select an insert option and go to your picture location.
- Click Apply.
- Click Close.
As with the other examples, your inserted image will appear in the background. By default, Word will auto-scale for the best fit. In the example below, my original logo image was only 25 px.
Can I Move a Watermark?
Yes, you can move a watermark, but the procedure is not intuitive.
- Scroll to the top of the document, which has your watermark.
- Click in the header or blank area at the top. This will open the Header area.

- Scroll back down to your watermark.
- Your mouse cursor will turn into one with 4 arrows. You may have to move it around a little bit. This indicates you’re in Move mode.
- Click and drag the item to the new document location.
- Click Close Header and Footer from the top menu.
Saving to Watermark Gallery
You probably noticed that Microsoft Word offers a menu option to save your mark to a gallery. But, again, this step requires you to utilize the document header.
- Scroll to the top of your document and click in the Header area. If you didn’t define one, this is the top white section.
- Scroll down to your watermark.
- Click the Design tab from the main menu.
- Click the Watermark button.
- Select Save Selection to Watermark Gallery…
- The Create New Building Block dialog opens.
- Provide a name and, optionally, a description.
- Click OK.
When you go to your watermarks, you’ll see a new entry. Simply click the custom watermark.

How to Remove a Word Watermark
Just as it’s easy to insert a watermark in Word, it’s also easy to remove one. The issue is there isn’t an object you can click or highlight to delete. Instead, you have to reverse your steps.
To remove a watermark,
- Open your Word document.
- Click the Design tab.
- In the Page Background group, double-click the Watermark button.
- Underneath the examples, click the entry Remove Watermark.
Whether your preference is text or images, Microsoft Office 365 and Word give you plenty of options without relying on WordArt. For example, watermarks can be a valuable enhancement to any Microsoft Word document. They help convey a document’s status, such as the “Draft” watermark or promote your branding with an image. And when you finally get out of “Draft” mode, there is a Remove Watermark option in the built-in menu.