Does your Microsoft Word keep ignoring spelling mistakes that should be flagged? This frustrating problem affects Word users daily. It’s often due to simple settings that need adjustment. Whether the problem is affecting one document or your entire Word installation, I’ll walk you through practical solutions and troubleshooting tips to restore your spell check functionality.
Knowledge You’ll Gain
By the end of this tutorial, you will be able to:
- How to identify if spell check is disabled for specific sections or entire documents
- Steps to fix spell check when it stops working in a single document
- Methods to restore spell check functionality across all Word documents
- Techniques to find and correct “Do not check spelling” settings using Find and Replace
- How to troubleshoot spell check issues caused by language settings and add-ins
I’ve encountered this annoyance many times. Usually, I can solve the issue with the steps below unless it’s a protected Microsoft Word document. However, you want to correct this issue because it may interfere with calculating your Word readability statistics and sanity.
Key Starting Questions
This problem has many causes and there isn’t one universal solution. I’ve found by answering some key questions, you can narrow down the solution.
- Does this problem happen with just one document or multiple documents?
- Have you checked your language and proofing settings?
- Does this problem happen with a new document?
- Does this problem happen when using Microsoft Word in Safe Mode?
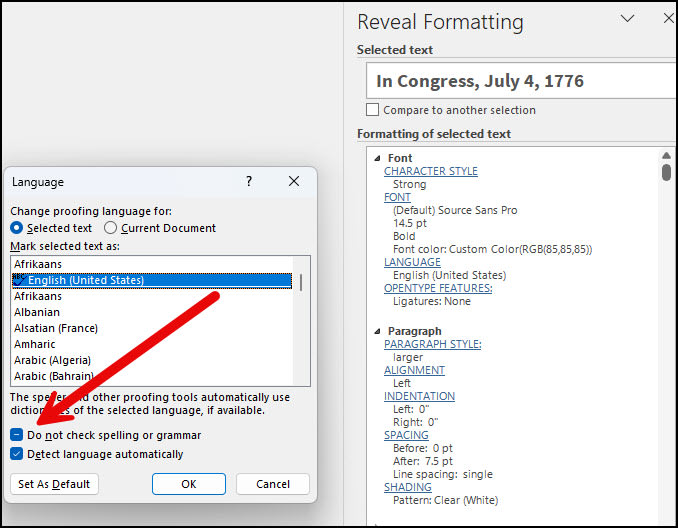
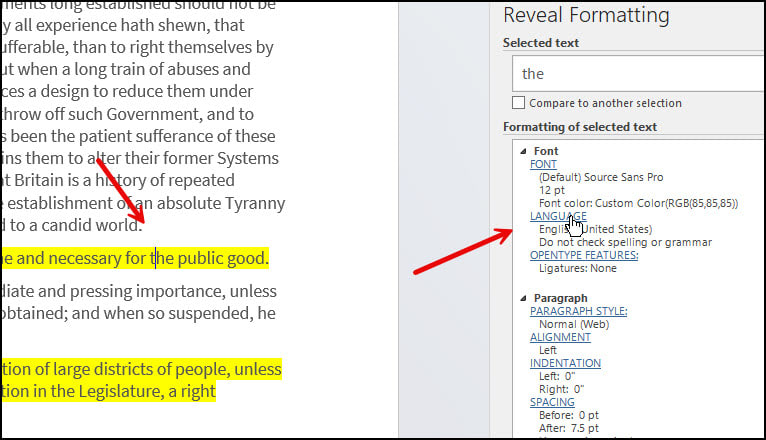
When troubleshooting, I find it beneficial to open the Reveal Formatting panel. In Microsoft 365, you can press Shift + F1. The panel will open on the right side. It shows your language and spell-check options based on an entire document or your text selection.

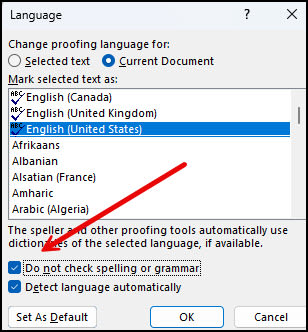
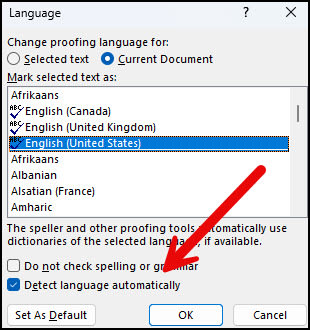
For example, in the screen snap above, I can tell my language is English (United States) and I’ve selected “Do not check spelling or grammar”.
If you don’t see the pane, you may have some Function lock on your keyboard. Generally, these keyboards have an F Lock key on the top row because there are other functions mapped. Other keyboards may use an Fn key.
Check Your Spell Check Settings First
Microsoft Word has 3 states for checking spelling and grammar. I like to think of them as YES, NO, and PARTIAL. If you see a checkmark, you know that this feature is turned on and that’s probably the cause of your problem. Unchecking the box and clicking OK should solve your problem.
And if this option is not checked, then the problem lies elsewhere.
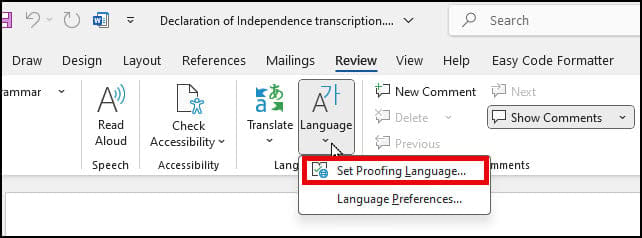
To Open the Language Dialog
- Open your Word doc.
- Click the Review tab.
- Click the Language icon.
- Select Set Proofing Language.
Sometimes, when you open your Language dialog, you’ll see a hyphen. I call this the “partial” state because it means somewhere on your document, you marked text as “Do not check spelling or grammar“.
Find Text With Disabled Spell Check
While you could open your document and systematically step through passages to see if the option showed in the Reveal Formatting panel, I find this tedious. Instead, I prefer to use Word’s advanced “Find and Replace”.
- Open your Word document.
- Press Ctrl+H to open the “Find and Replace” dialog.
- Click the Find tab.
- Click the More>> button if it shows. It will change to << Less.
- Click the Format button at the bottom.
- Select Language… from the drop-down menu.
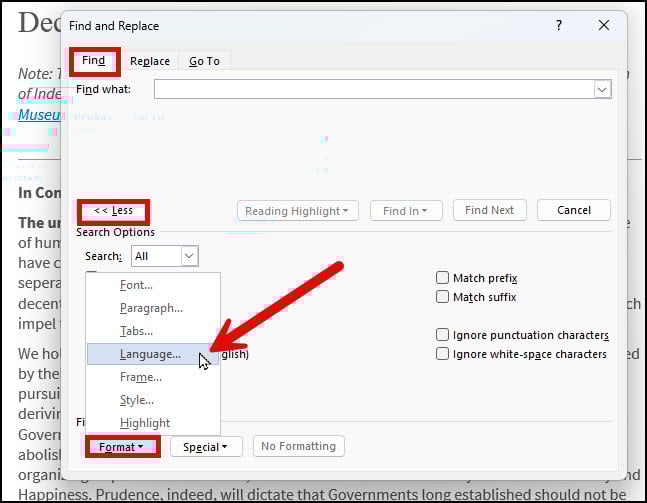
- In the Find Language dialog, select “Do not check spelling or grammar” so a checkmark shows.
- Click OK.
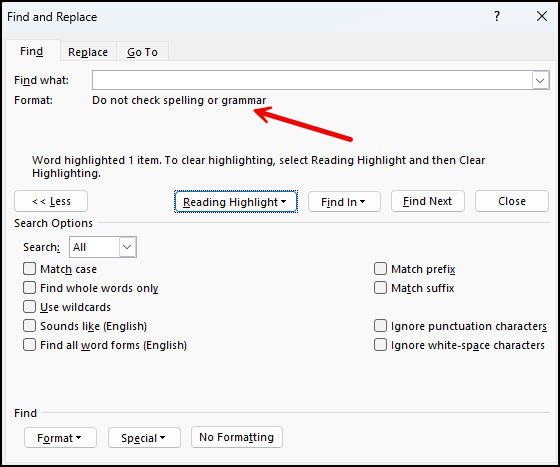
Before clicking Find In, I select Highlight All from the Reading Highlights menu. This allows me to easily see the passages.
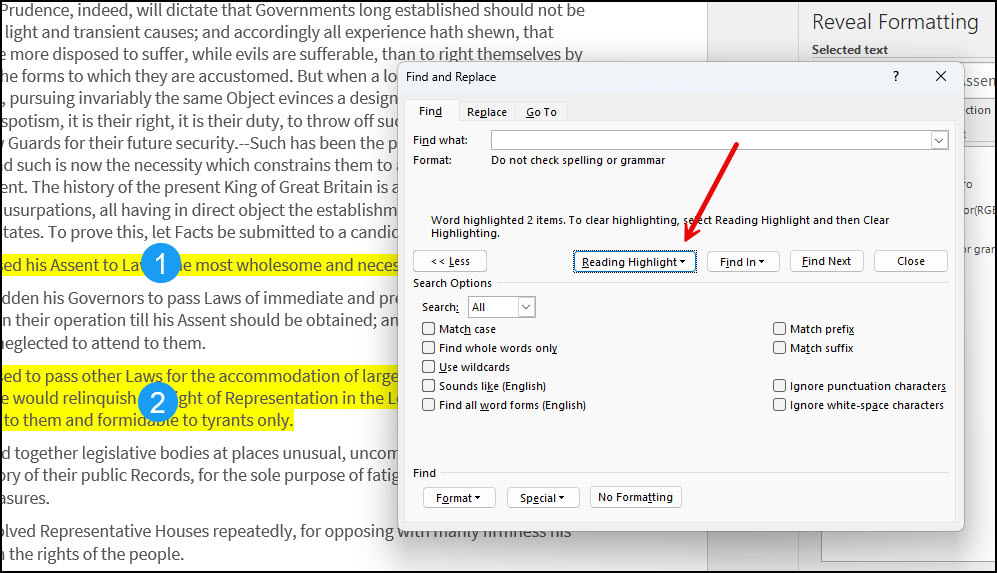
The reason I don’t use the Replace tab is because I want to review the selections first. Sometimes, there are passages that I do want to skip spell-check. I can click in the highlighted passage to verify the spelling setting. If I wish to turn off, I can click the Language link and deselect the spelling and grammar option.
TextExpander: Worth It? Find Out.
Is TextExpander the right tool to boost your productivity? Get an independent assessment, weigh the pros and cons, and make an informed decision. Find out why I’m a fan.
Read the ReviewFix Spell Check in One Document
Sometimes Word’s spell check won’t work for one document. However, you can open other documents, and spell check works fine. The problem might be your preferred languages or formatting settings.
Verify Your Proofing Language
- Open the problem document.
- Press Shift + F1. This will open the Reveal Formatting panel on the right side [D].
- Press the Ctrl + A keys to select the entire text.
- From the Review tab, select Language, then Set Proofing Language…
- Verify the correct default language is selected in the Language dialog box [B].
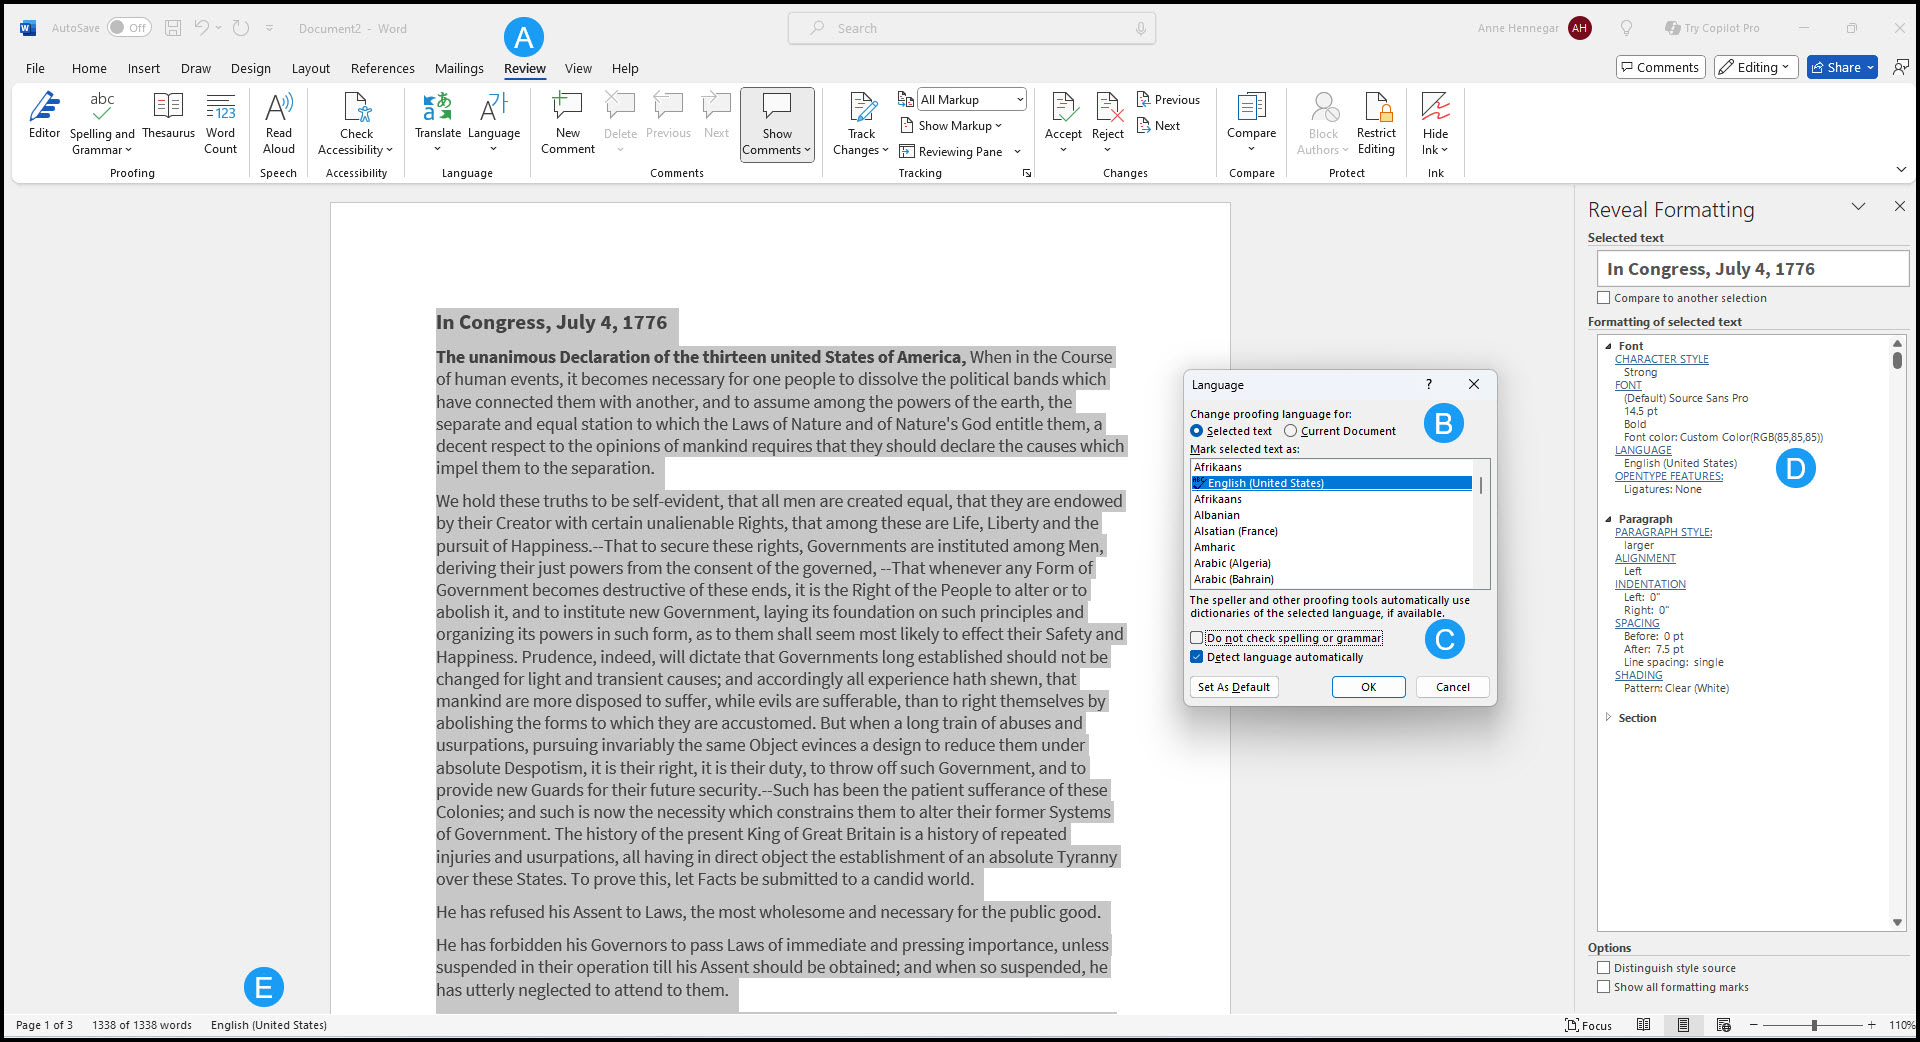
Note: You also want to ensure your language selection shows with a small ABC and checkmark. If not, Word can’t do spell-check.
- Click OK. Your selection should show in the Reveal Formatting panel [D] and possibly your Status bar [E] based on your options.
- Recheck your document by pressing F7.
Are Multiple Proofing Languages Set?
Looking at the screen capture above, you’ll notice I have three proofing languages above the double line. They are variations of English for Australia, Canada, United States. Word can get confused if you don’t enable “Detect language automatically.”
According to this support page, Microsoft noted several suggestions:
- Automatic language detection requires that a sentence of text be written in that language. Depending on the length of your sentences, you might need to type several sentences before Word has enough contextual information to automatically detect the language and apply the correct dictionary.
- Words that are spelled the same way in several languages, such as “centre” in English (United Kingdom) and French (France), might cause the Detect language automatically check box to identify the language of the text incorrectly. To solve this problem, type more words in the language you want, or clear the Detect language automatically check box.
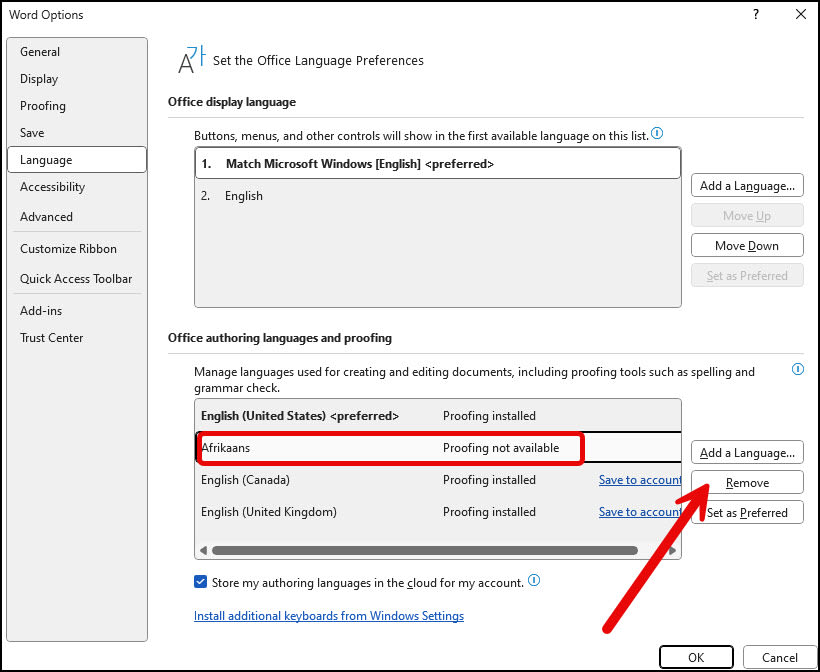
Now, some of you may be wondering why I didn’t list Afrikaans. While it does show above the line, it’s not a proofing language for me. If I go into File > Options > Language, I can see Proofing not available. I can also remove the language too. Microsoft does not provide proofing tools for all languages.
Review Proofing Exception Options
You should check another setting, as there is a Word option where you can elect to hide spelling errors. You can set this option on an individual file.
- Click the File tab.
- From the left panel, select Options.
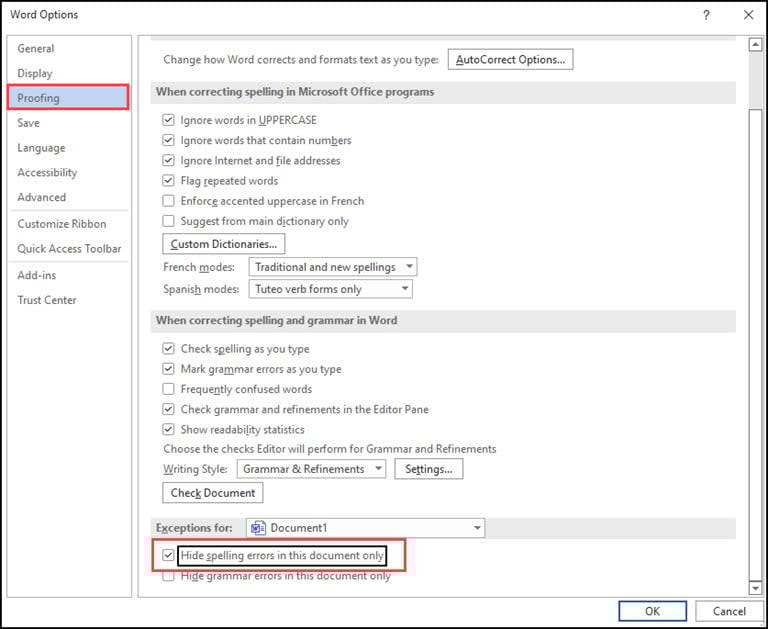
- In the Word Options dialog, click Proofing.
- Scroll to the bottom area called Exceptions for:
- Check if the Hide spelling errors in this document only check box is enabled.
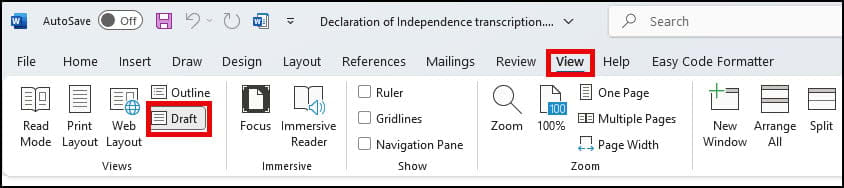
Try Using Word Spell Check in Draft Mode
This solution may seem far-fetched but Microsoft Word renders documents differently in Draft mode than Print Layout. Remember, “Draft” mode is a simplified version.
If spell check works in Draft mode, it suggests there is something with the document’s layout, formatting, or resources. For example, you have hidden fields or your CPU usage is so high the feature can’t run.
Fix Spell Check Across All Documents
This second problem can be a real annoyance with many variations. The suggestions range from easy to a Microsoft Windows registry change.
Option 1: Verify the “check spelling as you type” Feature
This feature is an option to see your mistakes as they happen. Toggling this check box “on” and “off” sometimes fixes the problem. Additionally, those red squiggly underlines might be from the Word Exclusion Dictionary.
To verify Spelling and Grammar Checkers are on,
- Click the File tab.
- From the left menu, select Options at the bottom.
- In the Word Options dialog, click Proofing.
- Check the boxes for Check spelling as you type and Mark grammar errors as you type. (See picture above.)
- Click OK.
Use the Check Document feature on your Review tab for older versions of Word.
Option 2: Check for Conflicting Word Add-ins
Still, your problem may be caused by a combination of factors such as another Word add-in. The way to verify this is to see if the spellchecker works in “safe mode.” Safe Mode is a reduced functionality state where Microsoft Word loads without add-ins.
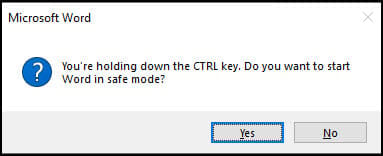
- Hold down your Ctrl key and then press the icon or menu option for Microsoft Word.
- Click Yes when the Safe Mode dialog appears.
- Open up your document.
- Press F7 to run spell-check.
If the spellchecker works, you need to figure out which add-in is causing the problem. There are two areas where you may see these.
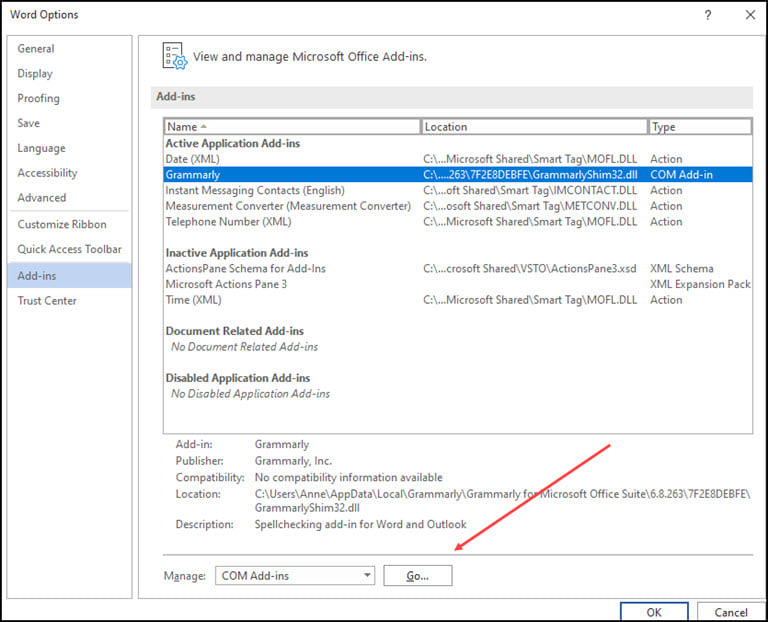
You can access this area from File > Options. In the Word Options dialog box select Add-ins. Hopefully, you recognize an add-in name such as Grammarly. Then you can press the Go button.
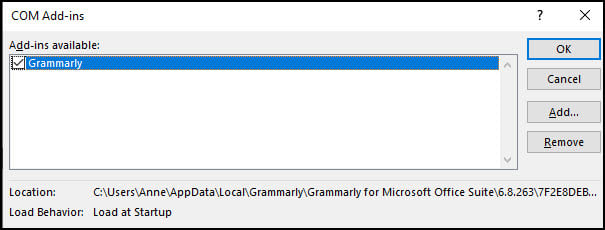
You’ll then get a COM Add-ins dialog where you can uncheck the box so it won’t load or remove it.
I’d suggest closing Word and reopening your document before checking again.
Option 3: Rename Your Microsoft Word Template
Your Microsoft Word document template, which is either normal.dot or normal.dotm, might also be causing an issue. You can find these files in your Microsoft Templates folder. When you rename the template, Word will reset to the default settings.
Because your global template file has your settings, I would recommend renaming the file to something like normalPRV.dot or normalPRV.dotm so you can change the name if this suggestion doesn’t work.
To find the location of your Word template.
Option 4: Try Detect and Repair
Now and then, I have the spell-check feature go wonky after some other software update or hardware change. For example, a registry entry has become corrupted. In these rare cases, you may have to repair your installation.
Option 5: Rename a Windows Registry Folder
I don’t like giving instructions on using the Windows registry. But sometimes, this online repair works.
If you’re unfamiliar with this area, I strongly recommend reading Microsoft’s https://docs.microsoft.com/en-US/troubleshoot/windows-server/performance/windows-registry-advanced-users.
As with an earlier suggestion, I rename the folder rather than deleting it. Some people rely on third-party dictionaries that may use some of these entries. If you find after renaming the folder, your 3rd party dictionary doesn’t work; you can revert the changes.
To rename the Proofing Tools folder,
- Close Word.
- Press the Windows key + R.
- In the Run dialog box, type regedit.
- Click the OK button.
- Expand the left pane to HKEY_CURRENT_USER | Software | Microsoft | Shared Tools| Proofing Tools
- Right-click the folder named 1.0
- Select Rename from the menu.
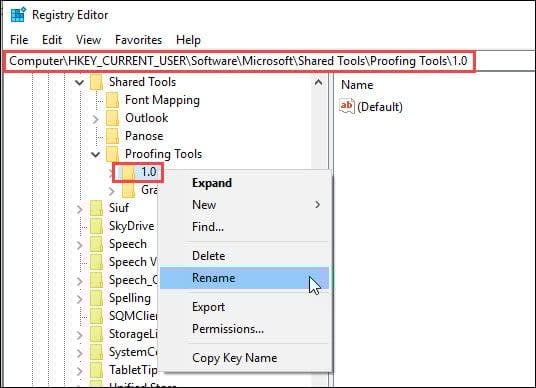
- Rename the folder to 1PRV.0
- Close regedit.
- Restart Microsoft Word.
Correct Ignored Words in Spell Check
Sometimes, you’ve run through the steps above, and Word still doesn’t flag an item that is misspelled. This can be frustrating, but sometimes the problem is us. Yes, I have misspelled words when adding them to Word’s custom spell-check dictionary. That’s why I also created an exclude dictionary for Word.
Check Your Custom Dictionary
- Click the File tab.
- From the left menu, select Options at the bottom.
- In the Word Options dialog, click Proofing.
- Scroll down to When correcting spelling in Microsoft Office program section.
- Click the Custom Dictionaries… button.
- Click the Edit Word List… button.
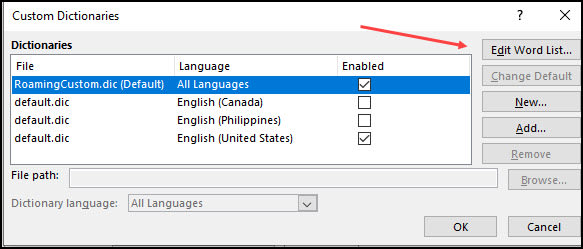
- Find your misspelled word and delete it.
- Add correct variation if needed.
- Click OK.
Try Another Online Option & Then Fix
This isn’t a fix, but it buys time if you’ve got a deliverable and Microsoft word spell check not working correctly. In the interim, you can save your document and try to open or copy it to another online word processor such as Google Docs or Microsoft Word Online. You will need to have an online account. Once you’ve imported your document, use that system’s spell-checker.
Now that you’ve restored your Word spell check functionality, you can focus on creating error-free documents. Why not continue your learning and become more productive with Microsoft Word and other tools? Below you’ll find more of my carefully selected guides that will help you work smarter, not harder.