Do you need to create a letterhead in Google Docs for your business or personal communications? A professional letterhead helps you present a consistent image across all documents. In this tutorial, I’ll show you how to design and save custom letterheads. You’ll learn two practical approaches that work perfectly with free Google Docs features.
Knowledge You’ll Gain
By the end of this tutorial, you will be able to:
- Set up header and footer areas for consistent letterhead placement
- Create custom letterhead designs using tables and columns
- Insert and format logos and images for professional branding
- Save and reuse templates in both free and paid versions
- Adjust margins and spacing for perfect letterhead alignment
Plan Your Letterhead Design
This tutorial is for Google Docs. I also wrote a tutorial how to make a letterhead in Microsoft Word.
Before I begin, I should mention that I’m building a business letterhead template from scratch that contains content using my brand colors and logo for demonstration purposes. Both versions are pretty simple. You may want to use your graphic designer’s design or artwork. I opted not to use the new Gemini AI features as I found them lacking.
I’ll show two different examples. One will leverage the header and footer areas. The other example splits the page layout into two columns and shows your letterhead info in the left column.
For people migrating from Microsoft Word, please be aware that Google Docs does not have anything like Quick Parts and the Building Block Organizer. While you can still build your letterhead, you can’t take advantage of reusable assets.
Google Docs Plans (Free vs. Paid)
The free version of Google Docs is a great product, but you can’t save your content as a template in your template gallery.
In contrast, the paid Google Workspace plan (previously called G Suite) allows you to submit your documents to your organization’s Template Gallery. When you log into the paid version, your Template Gallery looks like the one below.

[A] is the tab for your organization / private templates
[B] is the General public template group
What Do You Need on Your Letterhead?
The answer to this question varies based on your needs. Some items you might consider for a business letter might include:
- Logo
- Slogan / Tagline
- Name
- Address
- Phone numbers(s)
- Web address
- Email address
- Professional license numbers
- Memberships
- Date Established
- Awards
- Signature
Leverage Existing Templates
Before you begin, you might want to see if a template in the General Template Gallery is close to what you want. If so, you could use that template as your starting point. When you open Google Docs, there is a File > New > From a template menu option that will take you to the template gallery.

One issue with this gallery is the content changes and sometimes letter templates disappear. When I first wrote this tutorial, there were several, but they are gone.
Alternatively, you could open an existing Microsoft Word template and work from there. I had no issues opening mine. If you open a document for template purposes, it should be in one of the following formats: .doc, .docx, .html, .txt, .rtf, or .odt. While you can use PDF files with Google Docs, I worry that the OCR translation may not work.
TextExpander: Worth It? Find Out.
Is TextExpander the right tool to boost your productivity? Get an independent assessment, weigh the pros and cons, and make an informed decision. Find out why I’m a fan.
Read the ReviewSet Up Your Page Layout
I experienced several quirks in trying to do some simple templates. For example, one design I’m using leverages the header and footer. Some people prefer a vertical approach with the company info running down the left column.
Inserting a horizontal line is easy, but your margins define the length. If you want a full-width line, you’ll need to set your left and right margins to 0.
If you need to adjust your margins, I found it easier to do it first. You can access the Page setup… setting from the File menu.

When I was creating the vertical example, I had a hard time using columns. No matter what I tried, I couldn’t get anything but equal-sized columns, which resulted in a poor use of space. Instead, I used tables so that I could adjust column widths.
Easy Horizontal Design – Header & Footer
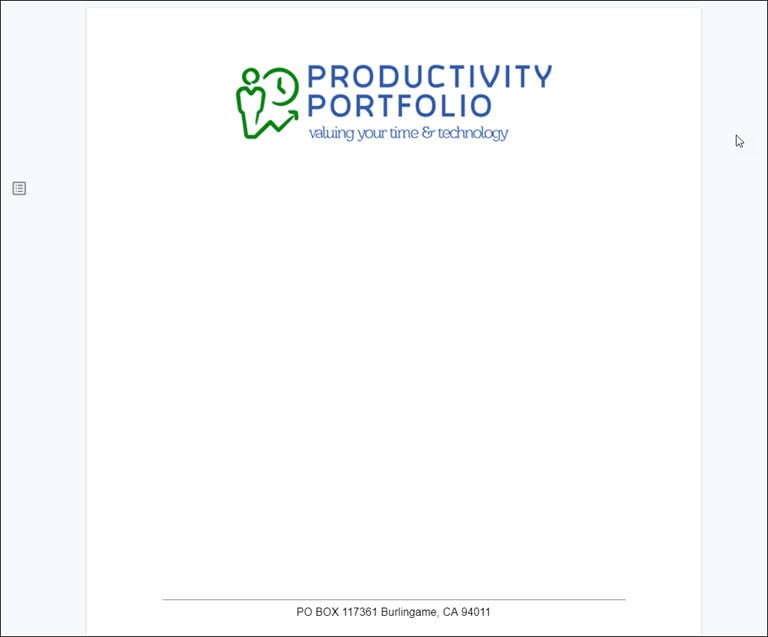
This preferred design uses the Header and Footer areas. Using these areas means you can control whether your information shows on all of your letter pages or just the first page.
Create Google Docs Page Header
For this example, I’ll add my logo to the header area.
- Open Google Docs
- Click the large + icon for a Blank template.
- You should be staring at a blank page.
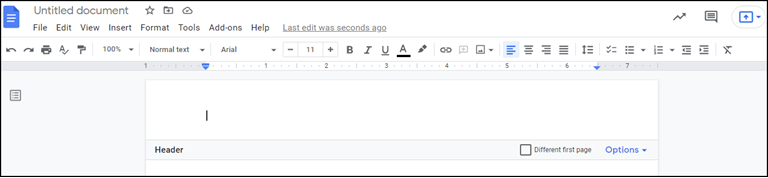
- From the Insert menu, select Headers & footers and then Header.

You may have zoomed your page display if you don’t see the Headers menu item. Try pressing Ctrl + 0 to reset. Yes, that is a zero.
You should now see a thin horizontal line and a checkbox about the different first-page headers. The line is just a visual marker and will not show on your letterhead.
Adding the Header Image
Google Docs has several different ways to add images and even more formats.
- From the Insert menu, select Image.
- Click Upload from computer from the side menu. Alternatively, you can upload from other sources such as Google Drive, Photos, URL, and camera.
- Navigate to your image file and upload. The image will show in your header area.
On my Windows PC, the File Open dialog shows a wide array of image formats. However, many less-known image file formats, like SVG, did not work. As a result, you will get a large red error box that reads, Unsupported image type.
- .tif
- .pjp
- .xbm
- .jxl
- .svgz
- .jpg
- .jpeg
- .ico
- .tiff
- .gif
- .svg
- .jfif
- .webp
- .png
- .bmp
- .pjpeg
- .avif
Some image file formats work in other Google properties, like Google Photos. I stuck to using a PNG file that was 600px by 140px. I prefer to capture and edit my images using a tool like SnagIt.
- Click the image to show the sizing handles.
The image will appear in the Header area with sizing handles around it. Your image may also appear larger than its actual size because of the document display properties.
Adjusting the Image Size
You can adjust the image size using the sizing handles. If you want more precise options, click the 3-dot button on the mini-toolbar and select All image options. You’ll then get the Image options dialog on the right side, where you can adjust the image size using inches or a percentage scale. (I’m guessing the “inches” criteria adjusts to your country’s setting, such as centimeters.)

Google Docs don’t allow you to size an image by pixel dimensions (e.g., 260 x 90). However, if you need this functionality, there is an Add-on called SetImageSize.
- Resize the image to your desired size.
- If you wish to change the image alignment, you can use the toolbar alignment options.
- Add any other design elements you need in the page header.
Defining the Page Footer
Creating a footer area is similar to the header.
- From the Insert menu, select Header and footer.
- From the side menu, select Footer.
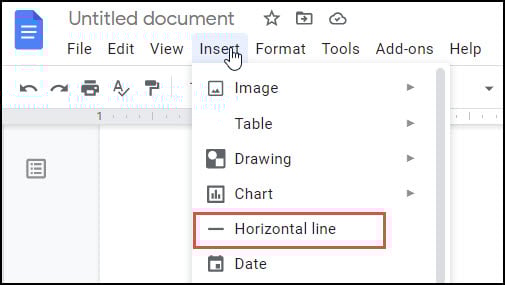
- From the Insert menu, select Horizontal line. The line width will respect your page settings.
- Add in your address or desired information.
At this point, I have an Untitled document with my logo in the header, a horizontal line, and address info in the page footer.
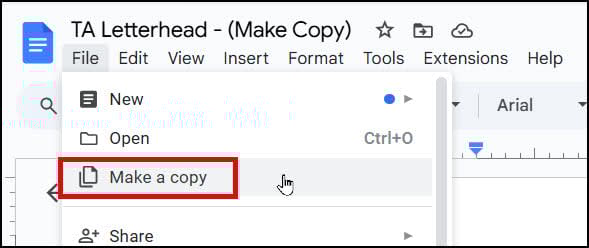
- The last step is to rename the Untitled document to something meaningful. I chose TA Letterhead – (Make Copy)
Making a Document Copy (template workaround)
Using the File command, you’ll see no option for Save As and a submenu like in most applications. However, there is an option called Make a copy.
Essentially, you keep making copies of this source file each time you need to use it. So, while this document won’t be in your Template Gallery on the free plan, you can use it in the same manner.
Build a Side Column Layout
Some people prefer their letterhead info to be shown on the left side and the body of the letter on the right. This effect is achieved using a 2-column table. I’ll edit what I include in this example because I’m dealing with a smaller space.
- Open a new blank Google doc or type doc.new in your browser address bar.
- From the Insert menu, select Table.
- Click the table squares to the right to have 2 columns and 1 row.

You should see one row of two equally spaced cells on your document. Your margin settings determine the row width.
- Right-click in the first cell and select Table Properties at the bottom
- The Table properties panel opens on the right side of your screen.
- Click Column to open the width input field.
- Your cursor should be in cell A. Tick the Column width box [B] and change the width to 2.5”. You can adjust it to suit your needs.

- From the Insert menu, select Image. Since I have a smaller size, I’ll just do the site icon.
- Add any other text you like.
Removing Table Borders
The last step is to hide the borders so the letterhead doesn’t look like a table.
- Right-click in any table cell. Make sure you didn’t click the image.
- Select Table properties from the menu.
- From the Table Properties side panel, click Color.
- Under the Table Border section, click the drop-down menu that shows 1 pt.
- Change the value to 0 pt.
You can now write your content on the right-hand side of your letterhead. You might want to put some placeholder text to start things off, such as the date, placeholder name, and address.
Want to learn more about Google Docs? Try this Coursera course.
Making a Letterhead Template (Google Workspace)
The paid Google Docs version in Google Workspace does allow for saving templates, provided your administrator enabled the feature for you. However, it’s not available on Business Starter. First, create your document using the steps above.
- Go back to your documents listing.
- To the far right, click the Template gallery link that is on the top section.
A new page appears with two tabs on top. The first tab [A] represents your organization’s templates. In my case, I don’t have any yet. The General tab represents global templates.
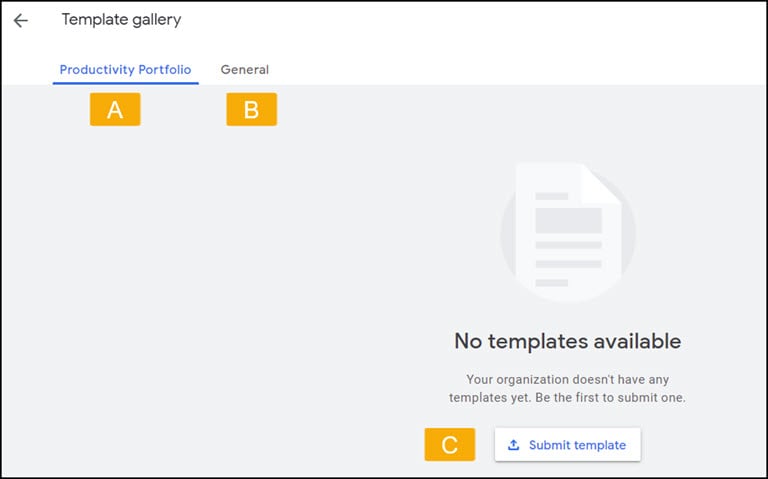
- Click the Submit template button [C]. The Submit a template dialog appears.

- Click the Select a document button. The Open a file dialog appears.
- Click the file you just created.
- Click the blue Open button in the lower left. Your file will show.
- (Optional) Toggle the slider Submit a copy of this file instead of the original. You will need to provide a new Title.
- Click the Category list link at the bottom.
- Select your category from the drop-down list, such as Letters.
- Click the Submit button.
The template will now show in your organization’s template gallery and your Recent documents. This template is also a shared document with other members of your organization.
Creating a professional letterhead becomes easier with proper setup and structure. This gives you consistency while focusing on your message. Below you’ll find more of my tutorials on Google’s document and productivity tools.