Ever wish you could design the perfect gift certificate, but find store-bought options boring? With Microsoft Word, you can create thoughtful, personalized gift certificates. In this step-by-step guide, I’ll walk you through the process. While it takes a little effort, the result is a gift certificate that will truly impress.
This tutorial is best suited for people who need to produce multiple gift certificates. For example, you wish to give them to customers or friends. If you just need a few, I’d suggest downloading a Microsoft template.
The process I’ll outline covers 5 tasks:
- Define what you want on your gift certificates
- Create a custom-size
- Create an Excel worksheet with your data
- Do a mail merge with the certificate info
- Apply final styling
Define Your Gift Certificate Elements
There is no set protocol for what goes on your gift voucher. You’re pretty much free to do whatever you wish. One caveat is that many regions do not allow you to use an expiration date. If you’re considering that field, check your local gift certificate laws.
For this tutorial, I’ve used a fictitious business, logo, and some data variables. The first set is constant on each batch. There is nothing sacred about these and you can add other elements like a web address, phone number, etc.
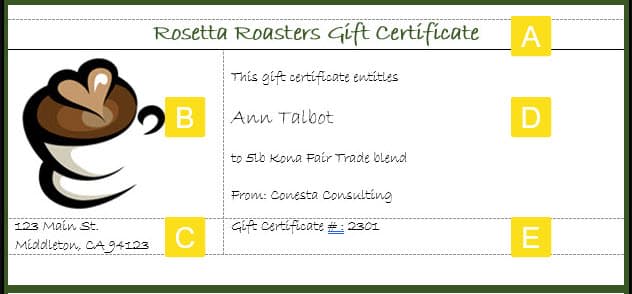
- [A] Gift certificate title
- [B] Logo or picture
- [C] Address
The second set varies based on the need or occasion. For example, sometimes you may want to give a dollar amount similar to a gift card. Other times, you want to give a specific item or service. These items may differ between recipients.
- [D] Recipient’s name, gift info, and gifter
- [E] Voucher number
Create a Custom Microsoft Word Label
Some people might be confused by my use of the word “label”. Don’t worry, we’re not using any sheets with adhesive backing that you’d slap on a box. Instead, I’m using the generic sense of “label” since we’re using Word’s label tool.
Surprisingly, I was appalled that there wasn’t any predefined gift certificate paper available that I liked on high-quality paper. This meant I needed to create my own. I decided to have each sheet of 8 ½” x 11″ paper hold 3 items. This way, each one could fit in a matching #10 envelope.
I also wanted to put some white space between each to make it easier to cut the gift certificates. A sharp paper cutter is nice for these situations, but scissors work. My local UPS Store has a nice paper cutter.
For this tutorial, we’ll create custom labels for 8.5 x 11 paper. These instructions also show the menu names for Microsoft 365. Your Microsoft Office version may differ, but the process is similar.
To make a custom label,
- From the Word ribbon, select Mailings and then Labels.
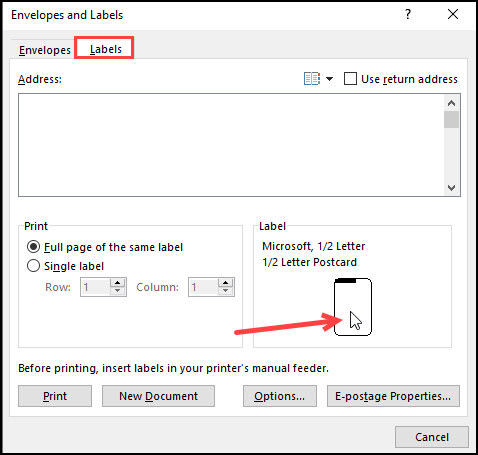
- On the Envelopes and Labels dialog box, click the Labels tab.
- Click the label graphic in the lower right.
- On the Label Options dialog, click the New Label… button.
- On the Label Details dialog, in the Paper Size: field, select Letter.
- Fill in the Label Details dialog with the size information for your voucher. In the diagram below, I selected Letter for Page Size. Each page will have 3 certificates that are 3″ in height and 6.5″ wide. Also, since each one spans the sheet, you don’t have to worry about Horizontal pitch.
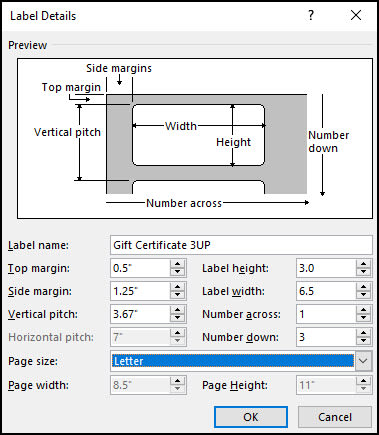
- Enter a descriptive Label name such as “Gift Certificate 3UP”.
- Click OK. You should now see your custom label show on the Label Options dialog under the Product number list box. The Label vendors value will show Other/Custom.
- Click OK.
- You can hit Cancel to close the dialog.
Create the Microsoft Excel Source File
Next, we’ll use Excel as the repository for our voucher information. The spreadsheet contains details for each certificate and recipient that we built using an Excel Data Form. If you wanted to get fancy, you could define your own custom drop-down list in Excel for Gifts to ensure consistency.
In our tutorial, we’re adding several columns. Each item will show:
- Gift certificate number
- The recipient’s name
- Their gift
- Donor (You or your company)

Again, there’s an opportunity for you to get creative. While I’ve used items found in a coffee shop, you could use anything from a “ski weekend” to “1-hour babysitting” to $50.
The only requirement is that you want to label your Excel columns. The header information will display when we get to Word’s mail merge.
We did an earlier Word mail merge tutorial using Excel to create personalized letters that share some of the same concepts.
Merge Excel Records with Word Label
At this stage, we’ll set up a mail merge to pull in the Excel records and display them on our custom label.
Start the Mail Merge
- Select Mailings from the ribbon.
- Click the small triangle next to the Start Mail Merge button.
- From the drop-down menu, select Step-by-Step Mail Merge Wizard…
- From the right Mail Merge pane, select Labels.
- Click Next Starting document from the bottom. This advances you to Step 2 of the wizard.
- Click Label options…
- The Label Options dialog opens. Change your Label Vendors to Other/Custom.
- Highlight your custom label from the Product number list box.
- Click OK.
Add Borders to Separate Template Items
I like to add a border to each gift certificate because it helps me see my boundaries. This is an area where you can customize with color and line types. I used a 6pt dark green border.
- Click the squarish icon outside the first certificate. A black shaded area will appear.
- From the Home menu, select Borders from the Paragraph group.
- Select Borders and Shading from the drop-down menu.
- Select All and apply your color and line thickness.
- Click OK.
You should see your 3 certificate areas with a border and a gap between each one.
Create the First Label
Now, we need to create the content for the first item. Our simple example will use a Microsoft Word table to lay out our content. I find it easier to tweak spacing by having items in different table cells.
- Insert your cursor in the first certificate.
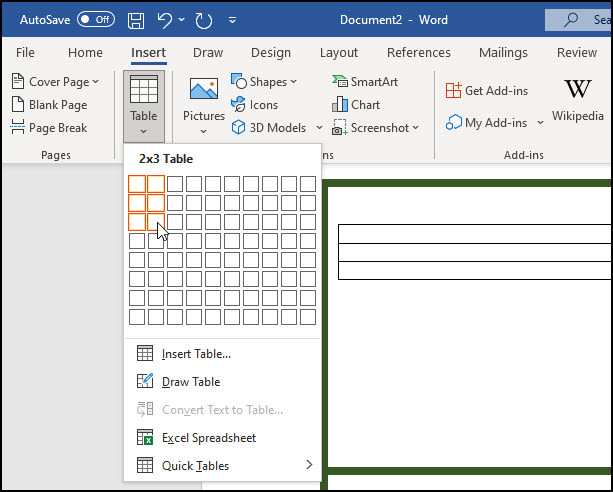
- From the Insert menu, select Table. I like to use 2 columns and 3 rows for layout.
- Highlight the first table row and right-click and select Merge Cells.
- Enter your certificate title in this first table row. For example, “Rosetta Roasters Gift Certificate.”
- In the first column on row 3, enter the business address. You can use 2 lines.
Add the Picture or Logo
- With your cursor in column 1 on the second row, select the Insert menu and Picture. Navigate to wherever your logo or graphic file resides.
- If your artwork doesn’t fit, you may need to resize it by clicking the picture and using the sizing handles. Alternatively, you could use resize using a tool like TechSmith’s SnagIt.
Add Certificate Text and Placeholders
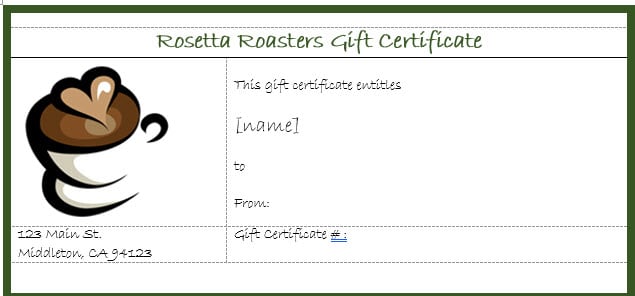
- In column 2 of row 2, add your certificate text and placeholders for the data. For example, you might type “This gift certificate entitles [name].” The [name] is a placeholder to make it easier to see where the data will go.
- In column 2 of row 3, I enter the certificate number such as Gift Certificate #:
Your certificate looks similar to the one below. You’ll notice we have not made any refinements such as changing fonts or positioning. We also have some table lines we might want to delete.

Apply Your Styling
This is where you get to be creative based on your needs. First, however, you want to apply your styling to the first certificate so you can copy it down to the other records. This is also a good time to spellcheck your Word document.
Also, since this is a table, you can easily adjust the column widths. For example, you might want less white space to the right of the image.
In the example below, I adjusted the column width, so the logo column is shorter. I also applied a different font and adjusted the table to go full width because I wanted a bottom border under the business name.
Add the Data Variables
This is where we will pull in the data from our Excel worksheet and remove the placeholder name. The goal is to get the first certificate correct.
- Click the Next link on the Mail Merge pane’s bottom to go to Step 3 of 6.
- Select the radio button to Use an existing list.
- Click the Browse.. link in the middle of the pane.
- In the Select Data Source dialog, point to the Excel spreadsheet you created earlier.
- The Select Table dialog opens. Click OK.
- The Mail Merge recipients dialog opens. You should see the contents from your Excel spreadsheet. Click OK.

You should see the certificates #2 and #3 show <<Next Record>> at the top.
Remove the Table Lines
The other item I like to do at this time is to remove the table lines so they don’t show on the final gift certificate.
- Click anywhere on the first certificate.
- From the Table menu, Select | Table. Your table contents will be highlighted.
- From the Format menu, select Borders and shading.
- Click the None box.
- Click OK. You will still see table grid lines, but these will not print.
Add the Data Fields
- In the Mail Merge pane, click Next to move to Step 4.
- Place your cursor to the right of the first placeholder you used, such as [name].
- On the task pane, click More items…
- In the Insert Merge Field dialog, highlight your field from Excel and click Insert. You should see your field name with chevrons on either side.
- Click Close.
- Remove your placeholder text for that field name, such as [name].
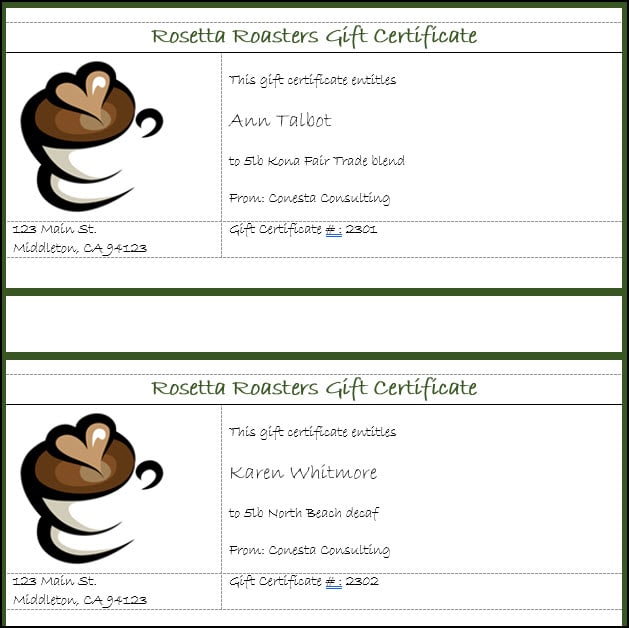
- Repeat this process for each data variable on Gift certificate 1.
Your certificate will look something like the one below.

Merge the Gift Certificate Data
If the first certificate looks fine, we want to copy the codes, image, and formatting to the other records on the sheet.
- Click on the second certificate under the <<Next Record>> code.
- Click the link Update all labels. Your 2nd and 3rd certificates should look similar to the first.
- Click the Next link to preview your labels. You should see the first three certificates populated with data from your source file.
- If everything things correct on the screen, click Complete the merge.
The last pane also has a link to edit individual labels. I always use this feature. I would’ve edited some of the certificates that had 2lb to 2 lb in this example. The other advantage is that this link opens your certificates up in a new document you can save.
Proofing Steps
As many times as I’ve created gift certificates for friends, I still make final adjustments. I like to print my first version to a PDF file and confirm everything is correct, and the dotted table lines don’t show. The good news is that the layout is easy to adjust.
After talking to friends who have used this tutorial, some have also added a column to the Excel spreadsheet for “Redeemed.” This field works well with the certificate number field. Others opted to wrap text around their picture. And some have told me they use Google Sheets as the source.
Making those types of changes is easy. The hard part is finding someone who will cut the gift certificates for you. Some printers offer this service for a small fee or for free. I can even send them the completed gift certificate file and specify the color and paper weight.
The beauty of designing your custom gift certificate is the freedom to personalize it. Add special colors, meaningful images, and heartfelt messages to reflect the recipient’s personality and interests. Ready to get creative? Remember, your thoughtful and customized certificate can easily be turned into a template for future use.