Have you ever wished for a simpler way to send emails to multiple people in Gmail without entering each address? Gmail’s distribution lists, created through Google Contacts Labels, offer an efficient solution to this problem. In this tutorial, I’ll walk you through the process of setting up a Gmail distribution list and allowing you to send group emails quickly and easily. (Includes video.)
Knowledge You Will Gain:
- Learn how to create and manage Gmail distribution lists using Labels
- Understand the difference between Labels, Groups, and distribution lists in Gmail
- Develop skills to send emails to multiple recipients
- Gain knowledge on organizing your contacts
- Learn how to edit and update your Gmail distribution lists
Before I start, I should clarify some terms. First, Google no longer uses the phrase “Google Groups” in its Contact Manager. Instead, they use the word “Label.” Google Groups is reserved for their public discussion groups and private forums. You may see me use “labels,” “groups,” and “lists” interchangeably. I prefer the original term “Groups”.
Understanding Gmail Distribution Lists
Distribution lists or email lists have long been a favorite feature for power email users in all email applications. They allow you to use a single list name that equates to everyone’s email addresses on the list.
For example, you could have a personal distribution list called “Family” that includes 25 of your relatives. Rather than typing or selecting each contact, you use the list address or label in the email address field. Gmail then translates this list to the equivalent email addresses.
One caveat is that these email lists work for your Google account but not for other contacts, even if they’re on your contact list. They are different than “mailing lists” that are usually managed by a dedicated service or organization. In other words, Uncle Joe won’t be able to use your family distribution list. Instead, he will have to create his own. Or, if you’re nice, you could export those contacts as a CSV file for him or send him the tutorial on how to create a Google Contacts import template.
Another item to remember is these email labels don’t show to others. For example, many people get emails from their companies with names like team@example.com. If you look at those emails, you see that group address in the From: field and often can reply to it. However, with Gmail lists, the outgoing email doesn’t show your group or mailing list label name.
Start with Google Contacts
For this tutorial, I am using a paid Google Workspace account. As a result, your screen may look slightly different from the free version. You can get to your contacts by going to https://contacts.google.com in your browser.
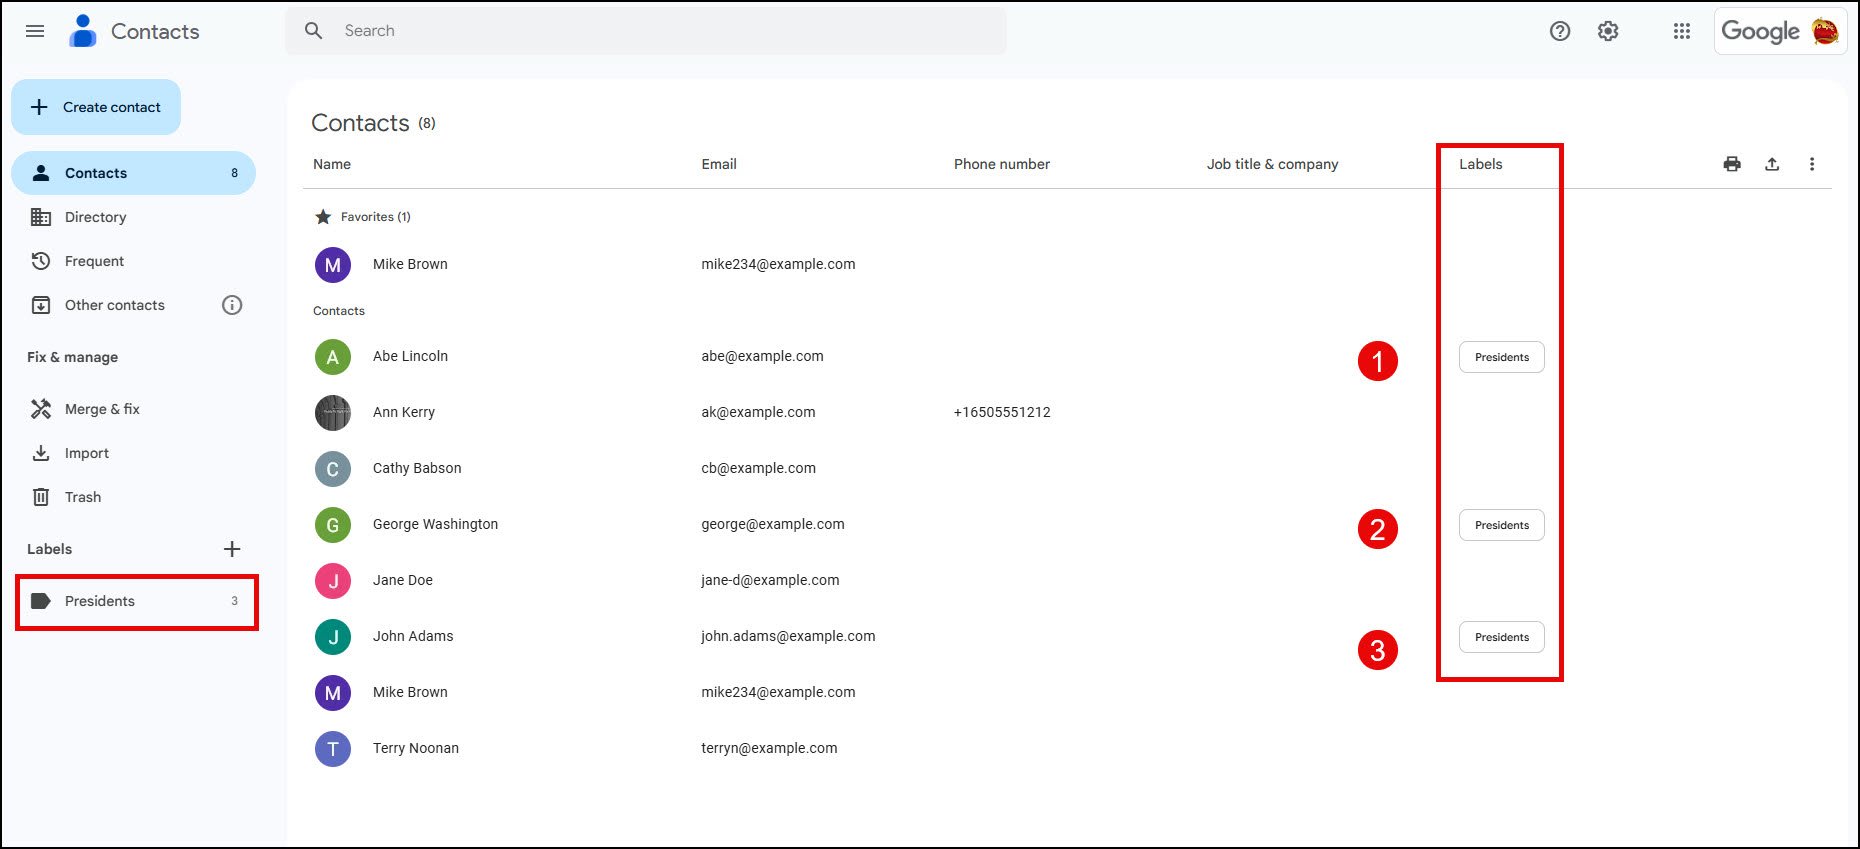
The Google’s Contacts Manager is divided into two parts, as shown in the picture below.
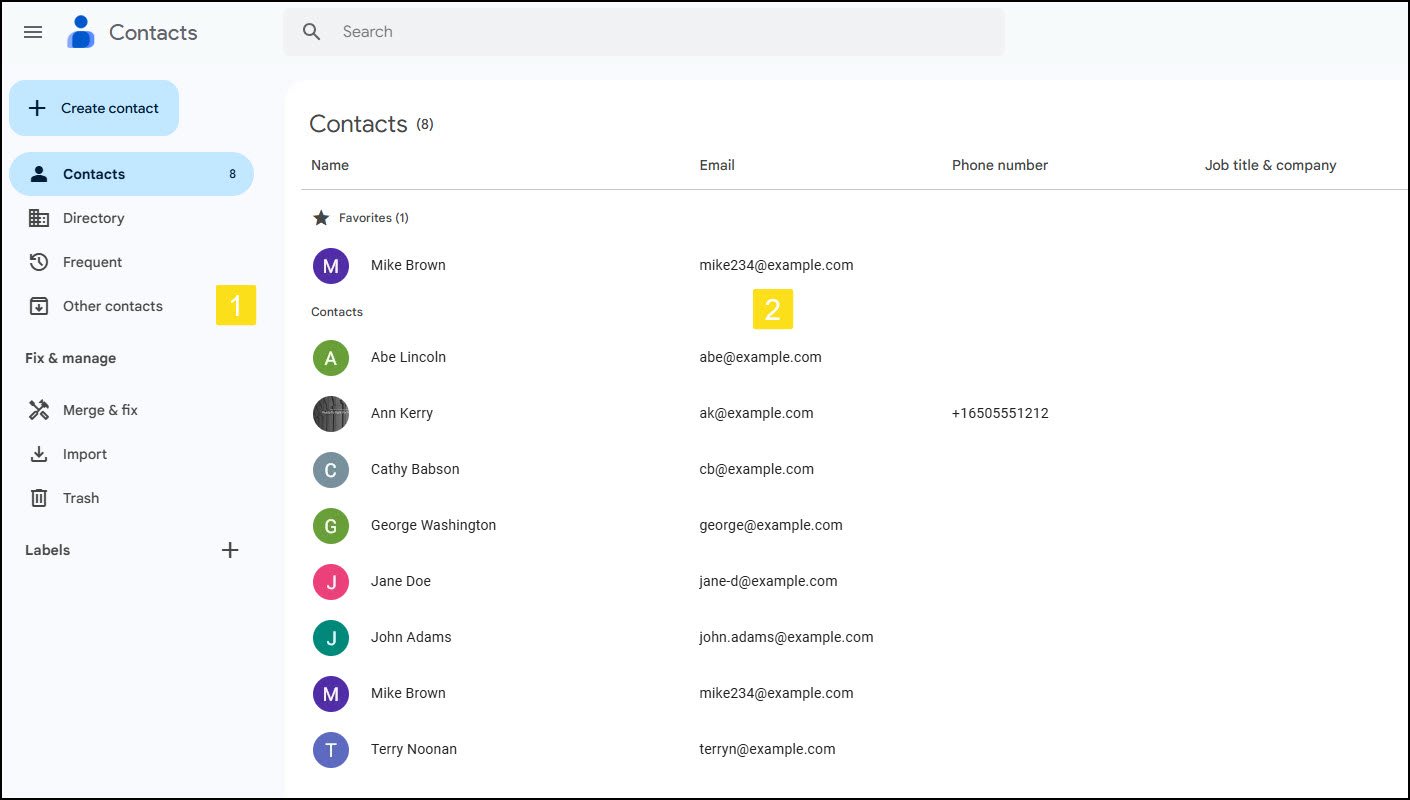
[1] This left section shows your existing Labels (groups) and functions. Some groups are automatically created based on your activities. For example, if you import records into Google Contacts, it will create a new contact label. Another example is Google’s Other Contacts.
[2] The right section displays the contact’s primary fields. In some cases, you may see incomplete entries. For example, you may have a starred contact synced from your Android phone, but you don’t have their email address.
How to Create Contact Labels (AKA Groups)
Groups or labels can either be created beforehand or at the time you select your contacts. Google does have two contact repositories – Contacts and Other Contacts. Most likely, you will just be using the main group.
- Hover your mouse over the contact’s icon and check the box to include it. Once you select a contact, new control icons appear at the top. I’ve outlined them below in red.
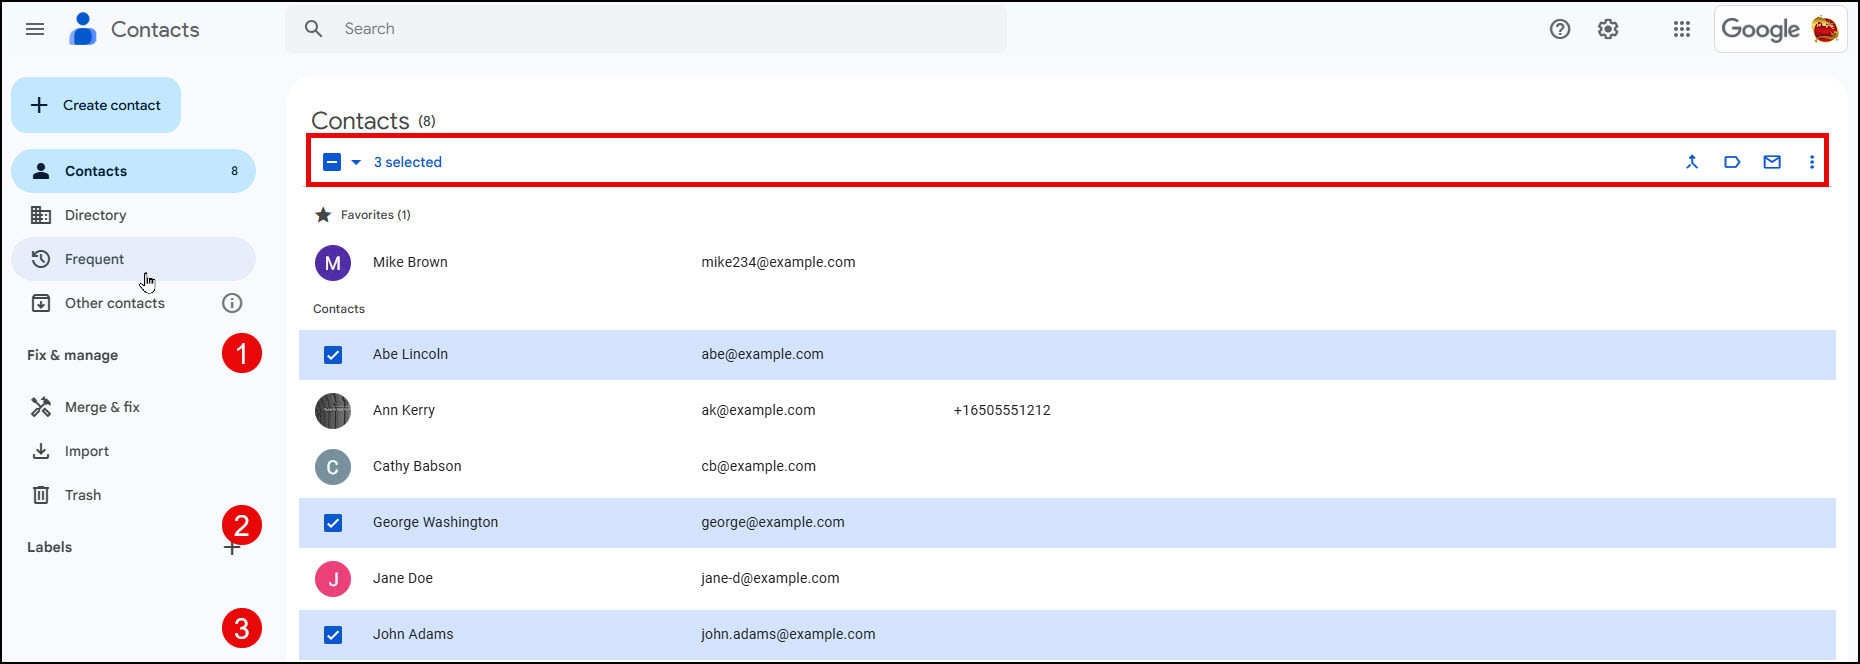
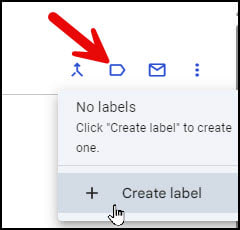
- Click the Manage labels icon from the top right and select Create label. The Label icon looks like a price tag.
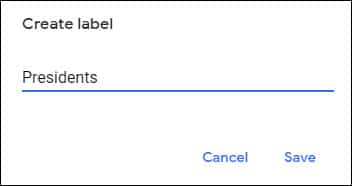
- Enter your new label name and click Save.
Your new label (aka group) should show on the left side with an indicator of how many contacts are in this group. And depending on your screen width, you should see values in the Labels column.
Using Contact Search to Build Distribution Lists
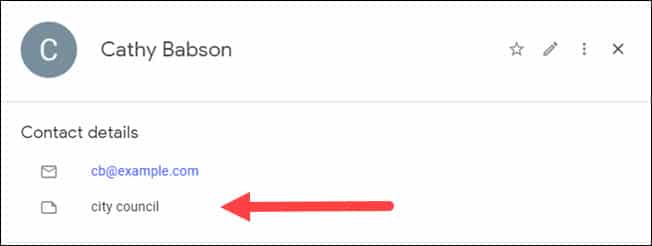
In this example, I wish to create a group for city council members. I previously added the text “city council” in the Notes field for various people.
- Open Google Contact Manager.
- Click the + sign to the right of Labels in the left menu.

- Provide the name of your group in the Create Label dialog.
- Click Save.
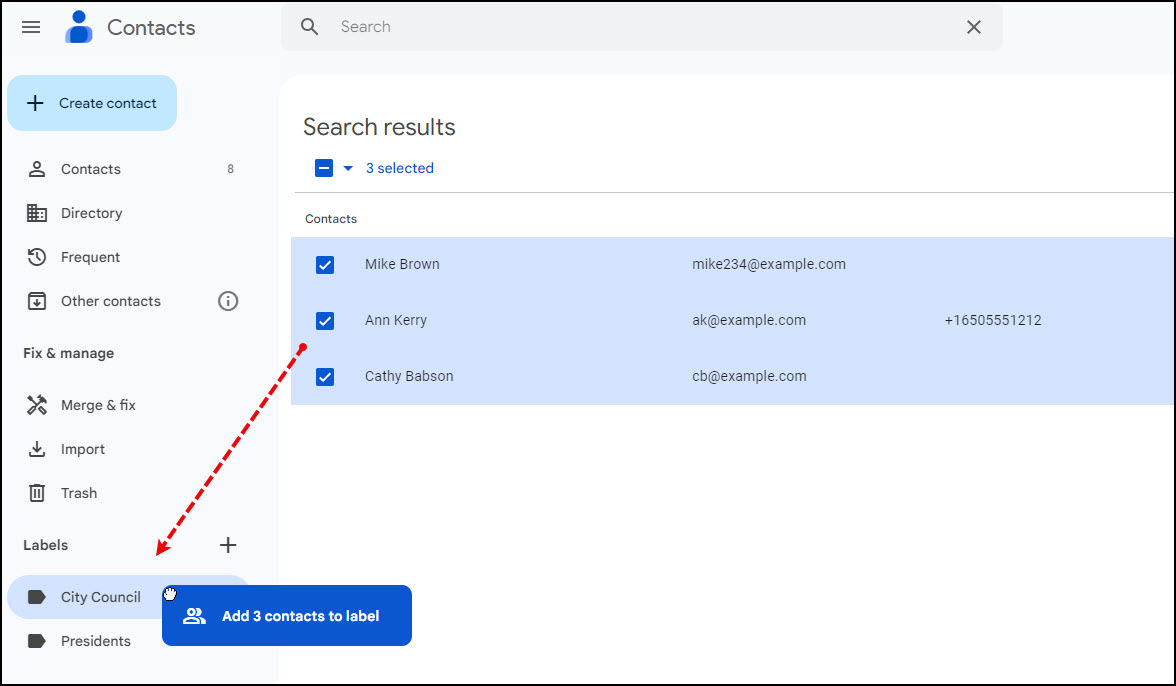
- In the Search text box at the top, enter your search criteria and press Enter. You should see the contacts that match your criteria.
- Hover over each contact and click the checkbox to include.
- Drag the contacts on top of your new label.
An important point to remember is if you create a group based on search criteria, the group isn’t dynamic. So, , if I make a group based on contacts with the note “city council” and add another contact with that note, it will not join my existing group.
Conversely, removing the note from a contact won’t delink the contact from my existing group.
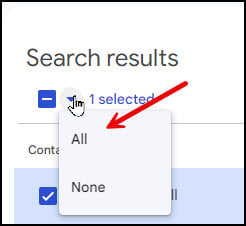
If you have a large number of items returned in your search, hover over the first entry and tick the checkbox. Then go to the down triangle next to the selection icon and choose All.
Sending Email to Your Gmail Distribution List
Emailing the members is simple once a group is created from your Google contacts. Although you can email from the Google Contact Manager, you can’t use labels.
- Open Gmail.
- Click the Compose button.
- In the To: text box, type the Google Contacts label name. It should appear once a match is found. In this case we can see there are 3 members.
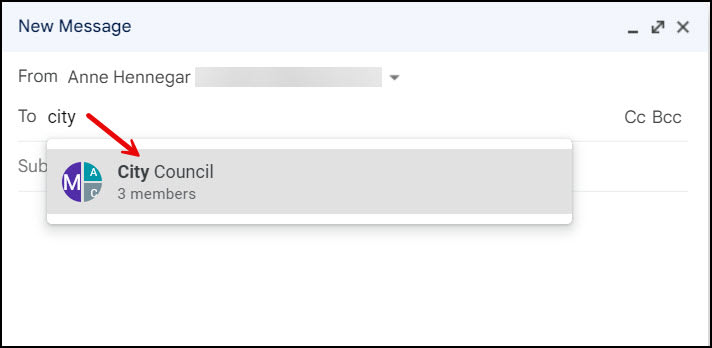
- Click the Group name, and all the members will show individually in your To: field. And yes, you can use the Cc and Bcc fields instead.
One item you may have to look out for is contacts with multiple email addresses. Gmail will use the first email address listed for the contact. You can see the order if you open the contact’s record.
Removing a Contact’s Label
Periodically, you may need to change a contact’s label. In my “city council” example, I would probably adjust the members based on election results.
- Click the contact record you’d like to change to see its details.
- Click the More actions button on the top right. It has three vertical dots.
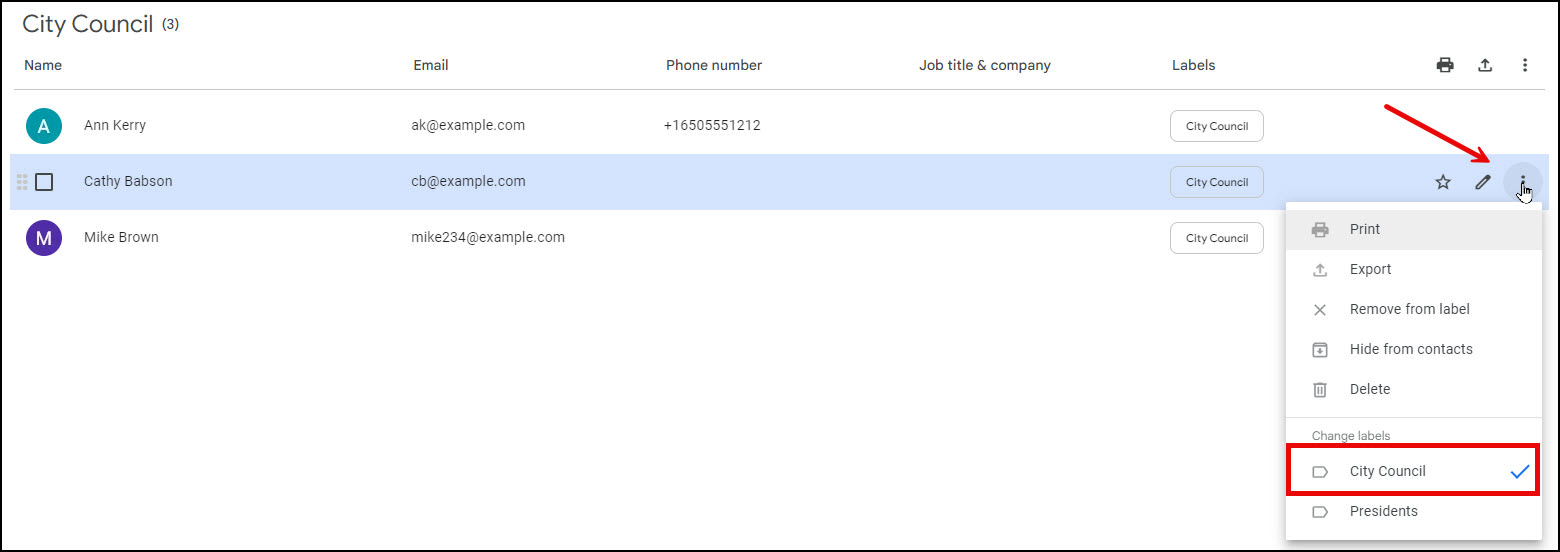
- In the Change labels section, click the label with the checkmark you want to remove.
Key Points & Takeaways
- Google no longer uses the phrase “Google Groups” in its contact manager. Instead, they use the word “Label.”
- Distribution lists or email lists allow you to use a single label name that equates to everyone’s email addresses on the list.
- In Gmail you can add multiple Contact Labels as recipients.
- These email lists work for your Google account but not for other Gmail users. Each user needs to create their own list.
- The outgoing email from a Gmail list never shows your group or label name. This means you can’t search or filter using them.
- You can create groups or labels ahead of time or when you select your contacts.
- Be aware of contacts with multiple email addresses. Gmail will use the first email address listed for the contact.
- You can use Contact Labels in other Google products like Google Calendar or Google Meet.
To wrap up, creating a Gmail distribution list using Contact Labels is a powerful way to streamline your email workflow. By following the procedure above, you can easily send emails to multiple recipients without entering each address.
Remember to keep your distribution lists up-to-date by regularly adding new contacts or removing outdated ones. Whether you’re coordinating with your work team or staying in touch with family and friends, Gmail distribution lists will make your communication process seamless.